



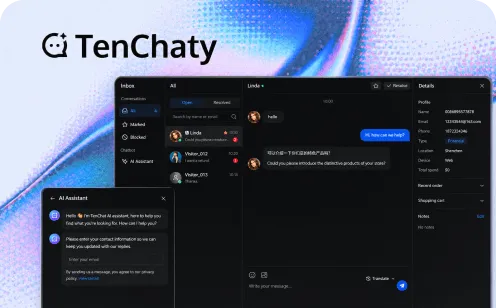


TL;DR — This tutorial walks you through building a production-ready chat application from scratch using Tencent RTC Chat SDK. You will implement 1-on-1 messaging, group chat, offline push notifications, and a pre-built UIKit — across Web (React), iOS, Android, and Flutter. Every step includes complete, runnable code. By the end, you will have a fully functional chat system ready for production deployment.
Introduction: What You Will Build
In this chat API integration tutorial, you will build a complete real-time messaging application that includes:
- 1-on-1 private messaging with text, images, and custom message types
- Group chat with admin controls, member management, and group notifications
- Offline push notifications via APNs (iOS) and FCM (Android) so users never miss a message
- Pre-built UIKit for rapid development with customizable themes and components
- A secure Token Server that generates authentication credentials server-side
The technology stack covers:
- Web: React 18+ with the
@tencentcloud/chatSDK - Mobile: Flutter (cross-platform) with native iOS/Android code references
- Backend: Node.js + Express for the UserSig token server
The final result is a polished chat interface with a conversation list on the left, a message thread in the center showing text bubbles, image previews, and timestamps, and a message input area with rich media support at the bottom. Users can switch between private conversations and group chats, receive push notifications when the app is backgrounded, and enjoy a smooth, responsive experience across all platforms.
Tencent RTC (referred to as TRTC throughout this guide) provides the underlying infrastructure — handling message routing, storage, synchronization, and delivery guarantees at scale. The Free Chat API tier gives you 1,000 monthly active users with no concurrent connection limits and includes push notification support, so you can build and test without cost constraints.
Let's get started.
Prerequisites
Before beginning this chat SDK tutorial, ensure you have the following:
| Requirement | Version | Purpose |
|---|---|---|
| Node.js | 18+ (LTS recommended) | Token server and React development |
| npm or yarn | Latest | Package management |
| TRTC Account | Free tier | Access to Chat SDK and console |
| SDKAppID | Obtained from console | Identifies your application |
| SecretKey | Obtained from console | Generates authentication tokens |
| React | 18.2+ or 19.x | Web front-end framework |
| Flutter | 3.10+ | Mobile cross-platform development |
| Code Editor | VS Code recommended | Development environment |
You should also have basic familiarity with JavaScript/TypeScript, React component patterns, and REST API concepts. If you are new to React, review the official getting-started guide first.
Step 1: Create Your Project and Obtain Credentials
1.1 Register Your TRTC Account
Navigate to the Free Chat API page and create a free account. The free tier includes:
- 1,000 monthly active users (MAU)
- No concurrent connection limits
- Push notification support included
- Full SDK access across all platforms
1.2 Create an Application
Once logged in to the TRTC Console:
- Click Create Application in the dashboard
- Enter your application name (e.g., "MyChatApp")
- Select Chat as the primary service
- Click Create
After creation, you will see your SDKAppID — a numeric identifier unique to your application. Copy this value.
1.3 Generate Your SecretKey
In your application's settings page:
- Navigate to Key Management
- Click Generate Key if no key exists
- Copy the SecretKey string (keep this secure — never expose it in client-side code)
1.4 Create the Configuration File
Create a configuration file to store your credentials. This file will be used by both your token server and client applications.
// config.js
const config = {
  SDKAppID: 1600000001, // Replace with your actual SDKAppID
  secretKey: 'your-secret-key-here', // NEVER expose this in client code
  adminUserID: 'administrator', // Admin account for server operations
  tokenExpiry: 86400 * 7, // Token validity: 7 days (in seconds)
};

module.exports = config;
Create a .env file for environment-specific overrides:
# .env
TRTC_SDK_APP_ID=1600000001
TRTC_SECRET_KEY=your-secret-key-here
TRTC_ADMIN_USER_ID=administrator
TOKEN_EXPIRY=604800
PORT=3001
Add .env to your .gitignore immediately:
echo ".env" >> .gitignore
echo "config.js" >> .gitignore
Your project structure should look like this at this stage:
my-chat-app/
├── .env
├── .gitignore
├── config.js
├── package.json
└── server/
    └── (token server files — next step)
Step 2: Build a Minimal Token Server
2.1 Why You Need UserSig
TRTC uses UserSig (User Signature) as its authentication mechanism. A UserSig is a cryptographic token that proves a user's identity when connecting to the chat service. It is generated using your SecretKey through an HMAC-SHA256 algorithm.
Critical security rule: UserSig must always be generated server-side. If you generate it on the client, anyone can decompile your app, extract the SecretKey, and forge tokens for any user — effectively taking over your entire chat system.
The authentication flow works as follows:
- Client sends userID to your token server
- Your server validates the user (via your own auth system)
- Server generates UserSig using SDKAppID + SecretKey + userID
- Server returns UserSig to the client
- Client uses UserSig to authenticate with TRTC Chat SDK
2.2 Build the Express Token Server
Initialize the server project:
mkdir server && cd server
npm init -y
npm install express cors dotenv
npm install tls-sig-api-v2
Create the server file:
// server/index.js
const express = require('express');
const cors = require('cors');
const TLSSigAPIv2 = require('tls-sig-api-v2');
require('dotenv').config({ path: '../.env' });

const app = express();
app.use(cors());
app.use(express.json());

// Load credentials from environment
const SDKAppID = parseInt(process.env.TRTC_SDK_APP_ID, 10);
const secretKey = process.env.TRTC_SECRET_KEY;
const tokenExpiry = parseInt(process.env.TOKEN_EXPIRY, 10) || 604800;

// Validate configuration on startup
if (!SDKAppID || !secretKey) {
  console.error('ERROR: TRTC_SDK_APP_ID and TRTC_SECRET_KEY must be set in .env');
  process.exit(1);
}

// Initialize the signature generator
const sigApi = new TLSSigAPIv2.Api(SDKAppID, secretKey);

/**
 * Generate UserSig for a given userID
 * In production, add your own authentication middleware here
 */
app.post('/api/auth/usersig', (req, res) => {
  const { userID } = req.body;

  // Input validation
  if (!userID || typeof userID !== 'string') {
    return res.status(400).json({
      error: 'Invalid request',
      message: 'userID is required and must be a non-empty string',
    });
  }

  // Validate userID format (alphanumeric, underscores, hyphens only)
  if (!/^[a-zA-Z0-9_-]{1,32}$/.test(userID)) {
    return res.status(400).json({
      error: 'Invalid userID',
      message: 'userID must be 1-32 characters, alphanumeric with underscores and hyphens only',
    });
  }

  try {
    // Generate the UserSig
    const userSig = sigApi.genSig(userID, tokenExpiry);

    console.log(`[${new Date().toISOString()}] Generated UserSig for: ${userID}`);

    return res.json({
      userSig,
      SDKAppID,
      userID,
      expiresIn: tokenExpiry,
    });
  } catch (error) {
    console.error('Failed to generate UserSig:', error);
    return res.status(500).json({
      error: 'Internal server error',
      message: 'Failed to generate authentication token',
    });
  }
});

// Health check endpoint
app.get('/api/health', (req, res) => {
  res.json({ status: 'ok', timestamp: new Date().toISOString() });
});

const PORT = process.env.PORT || 3001;
app.listen(PORT, () => {
  console.log(`Token server running on http://localhost:${PORT}`);
  console.log(`SDKAppID: ${SDKAppID}`);
  console.log(`Token expiry: ${tokenExpiry}s`);
});
2.3 Test the Token Server
Start the server and test it:
# Start the server
node server/index.js

# Test with curl (in another terminal)
curl -X POST http://localhost:3001/api/auth/usersig \
  -H "Content-Type: application/json" \
  -d '{"userID": "user_001"}'
Expected response:
{
  "userSig": "eJyrVgrxCdYrSy1SslIy0jNQ0gHzM1NS80oy0zLBPA...",
  "SDKAppID": 1600000001,
  "userID": "user_001",
  "expiresIn": 604800
}
2.4 Security Considerations
For production deployments, add these layers:
// Rate limiting
const rateLimit = require('express-rate-limit');
const limiter = rateLimit({
  windowMs: 15 * 60 * 1000, // 15 minutes
  max: 100, // Max 100 requests per window per IP
  message: { error: 'Too many requests', message: 'Please try again later' },
});
app.use('/api/auth', limiter);

// Your own authentication middleware
const authenticateUser = (req, res, next) => {
  const authHeader = req.headers.authorization;
  if (!authHeader || !authHeader.startsWith('Bearer ')) {
    return res.status(401).json({ error: 'Unauthorized' });
  }
  // Validate your own JWT/session token here
  // Ensure the requesting user matches the userID in the body
  const token = authHeader.split(' ')[1];
  // ... your validation logic ...
  next();
};

app.post('/api/auth/usersig', authenticateUser, (req, res) => {
  // ... existing logic ...
});
Never deploy the token server without authentication in production. The examples above skip auth for simplicity, but any public endpoint that generates UserSigs without verification is a critical security vulnerability.
Step 3: Integrate the Web SDK (React)
3.1 Create the React Project
# Create a new React project
npx create-react-app my-chat-web --template typescript
cd my-chat-web

# Install the TRTC Chat SDK
npm install @tencentcloud/chat
npm install tim-upload-plugin
3.2 Initialize the SDK
Create a chat service module that handles SDK initialization and provides a singleton instance:
// src/chat/chatService.ts
import TencentCloudChat, { ChatSDK } from '@tencentcloud/chat';
import TIMUploadPlugin from 'tim-upload-plugin';

const SDKAppID = parseInt(process.env.REACT_APP_SDK_APP_ID || '0', 10);

let chatInstance: ChatSDK | null = null;

export function getChatSDK(): ChatSDK {
  if (chatInstance) return chatInstance;

  chatInstance = TencentCloudChat.create({
    SDKAppID,
  });

  // Register the upload plugin for sending images, videos, files
  chatInstance.registerPlugin({ 'tim-upload-plugin': TIMUploadPlugin });

  // Set log level (0 = debug, 1 = info, 2 = warn, 3 = error, 4 = none)
  chatInstance.setLogLevel(1);

  return chatInstance;
}

export { TencentCloudChat };
export type { ChatSDK };
Add the SDK App ID to your React environment:
# .env.local (in the React project root)
REACT_APP_SDK_APP_ID=1600000001
REACT_APP_TOKEN_SERVER=http://localhost:3001
3.3 Login with UserSig
Create an authentication hook that fetches the UserSig from your token server and logs in:
// src/chat/useChat.ts
import { useState, useEffect, useCallback, useRef } from 'react';
import { getChatSDK, TencentCloudChat, ChatSDK } from './chatService';

interface UseChatOptions {
  userID: string;
  autoLogin?: boolean;
}

interface UseChatReturn {
  chat: ChatSDK | null;
  isLoggedIn: boolean;
  isLoading: boolean;
  error: string | null;
  login: () => Promise<void>;
  logout: () => Promise<void>;
}

export function useChat({ userID, autoLogin = true }: UseChatOptions): UseChatReturn {
  const [isLoggedIn, setIsLoggedIn] = useState(false);
  const [isLoading, setIsLoading] = useState(false);
  const [error, setError] = useState<string | null>(null);
  const chatRef = useRef<ChatSDK | null>(null);

  const login = useCallback(async () => {
    if (!userID) return;

    setIsLoading(true);
    setError(null);

    try {
      // Fetch UserSig from your token server
      const tokenServer = process.env.REACT_APP_TOKEN_SERVER;
      const response = await fetch(`${tokenServer}/api/auth/usersig`, {
        method: 'POST',
        headers: { 'Content-Type': 'application/json' },
        body: JSON.stringify({ userID }),
      });

      if (!response.ok) {
        throw new Error(`Token server error: ${response.status}`);
      }

      const { userSig } = await response.json();

      // Initialize and login
      const chat = getChatSDK();
      chatRef.current = chat;

      await chat.login({ userID, userSig });
      setIsLoggedIn(true);
      console.log(`Logged in as: ${userID}`);
    } catch (err: any) {
      setError(err.message || 'Login failed');
      console.error('Chat login error:', err);
    } finally {
      setIsLoading(false);
    }
  }, [userID]);

  const logout = useCallback(async () => {
    if (chatRef.current) {
      await chatRef.current.logout();
      setIsLoggedIn(false);
      console.log('Logged out');
    }
  }, []);

  useEffect(() => {
    if (autoLogin && userID) {
      login();
    }
    return () => {
      // Cleanup on unmount
      if (chatRef.current && isLoggedIn) {
        chatRef.current.logout();
      }
    };
  }, [userID, autoLogin, login]);

  return {
    chat: chatRef.current,
    isLoggedIn,
    isLoading,
    error,
    login,
    logout,
  };
}
3.4 Send Messages
Create a message sending utility that supports text, image, and custom message types:
// src/chat/messageService.ts
import { getChatSDK, TencentCloudChat } from './chatService';

/**
 * Send a text message to a user or group
 */
export async function sendTextMessage(
  to: string,
  text: string,
  isGroup: boolean = false
): Promise<any> {
  const chat = getChatSDK();

  const message = chat.createTextMessage({
    to,
    conversationType: isGroup
      ? TencentCloudChat.TYPES.CONV_GROUP
      : TencentCloudChat.TYPES.CONV_C2C,
    payload: { text },
  });

  const result = await chat.sendMessage(message);
  return result.data.message;
}

/**
 * Send an image message
 */
export async function sendImageMessage(
  to: string,
  file: File,
  isGroup: boolean = false
): Promise<any> {
  const chat = getChatSDK();

  const message = chat.createImageMessage({
    to,
    conversationType: isGroup
      ? TencentCloudChat.TYPES.CONV_GROUP
      : TencentCloudChat.TYPES.CONV_C2C,
    payload: { file },
    onProgress: (percent: number) => {
      console.log(`Upload progress: ${Math.floor(percent * 100)}%`);
    },
  });

  const result = await chat.sendMessage(message);
  return result.data.message;
}

/**
 * Send a custom message (e.g., location, product card, etc.)
 */
export async function sendCustomMessage(
  to: string,
  data: object,
  description: string,
  isGroup: boolean = false
): Promise<any> {
  const chat = getChatSDK();

  const message = chat.createCustomMessage({
    to,
    conversationType: isGroup
      ? TencentCloudChat.TYPES.CONV_GROUP
      : TencentCloudChat.TYPES.CONV_C2C,
    payload: {
      data: JSON.stringify(data),
      description,
      extension: '',
    },
  });

  const result = await chat.sendMessage(message);
  return result.data.message;
}
3.5 Receive Messages (Event Listening)
Set up real-time message reception using the SDK's event system:
// src/chat/useMessages.ts
import { useState, useEffect, useCallback } from 'react';
import { getChatSDK, TencentCloudChat } from './chatService';

interface Message {
  ID: string;
  type: string;
  payload: any;
  from: string;
  to: string;
  time: number;
  flow: 'in' | 'out';
  conversationID: string;
  nick: string;
  avatar: string;
}

export function useMessages(conversationID: string) {
  const [messages, setMessages] = useState<Message[]>([]);
  const [isLoading, setIsLoading] = useState(false);

  // Listen for new incoming messages
  useEffect(() => {
    const chat = getChatSDK();

    const handleMessageReceived = (event: any) => {
      const newMessages = event.data as Message[];

      // Filter messages for the current conversation
      const relevantMessages = newMessages.filter(
        (msg) => msg.conversationID === conversationID
      );

      if (relevantMessages.length > 0) {
        setMessages((prev) => [...prev, ...relevantMessages]);
      }
    };

    // Register the event listener
    chat.on(TencentCloudChat.EVENT.MESSAGE_RECEIVED, handleMessageReceived);

    return () => {
      chat.off(TencentCloudChat.EVENT.MESSAGE_RECEIVED, handleMessageReceived);
    };
  }, [conversationID]);

  // Fetch message history
  const loadHistory = useCallback(
    async (count: number = 20) => {
      setIsLoading(true);
      const chat = getChatSDK();

      try {
        const result = await chat.getMessageList({
          conversationID,
          count,
        });

        setMessages(result.data.messageList);
        return result.data.isCompleted; // true if no more history
      } catch (err) {
        console.error('Failed to load message history:', err);
        return true;
      } finally {
        setIsLoading(false);
      }
    },
    [conversationID]
  );

  return { messages, isLoading, loadHistory };
}
3.6 Create Group Chats
// src/chat/groupService.ts
import { getChatSDK, TencentCloudChat } from './chatService';

/**
 * Create a new group chat
 */
export async function createGroup(
  name: string,
  memberIDs: string[],
  type: 'Work' | 'Public' | 'Meeting' | 'AVChatRoom' = 'Work'
): Promise<any> {
  const chat = getChatSDK();

  const groupTypeMap = {
    Work: TencentCloudChat.TYPES.GRP_WORK,
    Public: TencentCloudChat.TYPES.GRP_PUBLIC,
    Meeting: TencentCloudChat.TYPES.GRP_MEETING,
    AVChatRoom: TencentCloudChat.TYPES.GRP_AVCHATROOM,
  };

  const result = await chat.createGroup({
    name,
    type: groupTypeMap[type],
    memberList: memberIDs.map((userID) => ({ userID })),
  });

  return result.data.group;
}

/**
 * Join an existing group
 */
export async function joinGroup(groupID: string): Promise<void> {
  const chat = getChatSDK();
  await chat.joinGroup({ groupID });
}

/**
 * Get group member list
 */
export async function getGroupMembers(groupID: string): Promise<any[]> {
  const chat = getChatSDK();
  const result = await chat.getGroupMemberList({
    groupID,
    count: 100,
    offset: 0,
  });
  return result.data.memberList;
}

/**
 * Dismiss a group (owner only)
 */
export async function dismissGroup(groupID: string): Promise<void> {
  const chat = getChatSDK();
  await chat.dismissGroup(groupID);
}
3.7 Pull Message History
// src/chat/historyService.ts
import { getChatSDK } from './chatService';

interface MessageHistoryOptions {
  conversationID: string;
  nextReqMessageID?: string;
  count?: number;
}

/**
 * Paginated message history retrieval
 */
export async function getMessageHistory({
  conversationID,
  nextReqMessageID,
  count = 15,
}: MessageHistoryOptions) {
  const chat = getChatSDK();

  const params: any = { conversationID, count };

  // For pagination, pass the ID of the last message from the previous fetch
  if (nextReqMessageID) {
    params.nextReqMessageID = nextReqMessageID;
  }

  const result = await chat.getMessageList(params);

  return {
    messages: result.data.messageList,
    nextReqMessageID: result.data.nextReqMessageID,
    isCompleted: result.data.isCompleted, // true = no more messages
  };
}
3.8 Complete React Chat Component
Here is a fully functional React chat component that ties everything together:
// src/components/ChatApp.tsx
import React, { useState, useEffect, useRef, FormEvent } from 'react';
import { useChat } from '../chat/useChat';
import { useMessages } from '../chat/useMessages';
import { sendTextMessage, sendImageMessage } from '../chat/messageService';
import { createGroup } from '../chat/groupService';
import { getChatSDK, TencentCloudChat } from '../chat/chatService';

interface Conversation {
  conversationID: string;
  type: string;
  userProfile?: { userID: string; nick: string; avatar: string };
  groupProfile?: { groupID: string; name: string; avatar: string };
  lastMessage?: { messageForShow: string; lastTime: number };
  unreadCount: number;
}

export function ChatApp({ userID }: { userID: string }) {
  const { chat, isLoggedIn, isLoading: authLoading, error } = useChat({ userID });
  const [conversations, setConversations] = useState<Conversation[]>([]);
  const [activeConversation, setActiveConversation] = useState<string>('');
  const [inputText, setInputText] = useState('');
  const { messages, loadHistory } = useMessages(activeConversation);
  const messagesEndRef = useRef<HTMLDivElement>(null);
  const fileInputRef = useRef<HTMLInputElement>(null);

  // Load conversation list
  useEffect(() => {
    if (!isLoggedIn) return;

    const chat = getChatSDK();

    const loadConversations = async () => {
      const result = await chat.getConversationList();
      setConversations(result.data.conversationList);
    };

    loadConversations();

    // Listen for conversation updates
    const handleConvUpdate = (event: any) => {
      setConversations(event.data);
    };

    chat.on(TencentCloudChat.EVENT.CONVERSATION_LIST_UPDATED, handleConvUpdate);

    return () => {
      chat.off(TencentCloudChat.EVENT.CONVERSATION_LIST_UPDATED, handleConvUpdate);
    };
  }, [isLoggedIn]);

  // Load history when conversation changes
  useEffect(() => {
    if (activeConversation) {
      loadHistory(20);
    }
  }, [activeConversation, loadHistory]);

  // Auto-scroll to bottom
  useEffect(() => {
    messagesEndRef.current?.scrollIntoView({ behavior: 'smooth' });
  }, [messages]);

  const handleSend = async (e: FormEvent) => {
    e.preventDefault();
    if (!inputText.trim() || !activeConversation) return;

    const isGroup = activeConversation.startsWith('GROUP');
    const to = activeConversation.replace(/^(C2C|GROUP)/, '');

    await sendTextMessage(to, inputText, isGroup);
    setInputText('');
  };

  const handleImageUpload = async (e: React.ChangeEvent<HTMLInputElement>) => {
    const file = e.target.files?.[0];
    if (!file || !activeConversation) return;

    const isGroup = activeConversation.startsWith('GROUP');
    const to = activeConversation.replace(/^(C2C|GROUP)/, '');

    await sendImageMessage(to, file, isGroup);
  };

  const handleCreateGroup = async () => {
    const name = prompt('Enter group name:');
    const members = prompt('Enter member IDs (comma-separated):');
    if (!name || !members) return;

    const memberIDs = members.split(',').map((id) => id.trim());
    const group = await createGroup(name, memberIDs);
    console.log('Group created:', group.groupID);
  };

  if (authLoading) return <div className="chat-loading">Connecting...</div>;
  if (error) return <div className="chat-error">Error: {error}</div>;
  if (!isLoggedIn) return <div className="chat-loading">Not logged in</div>;

  return (
    <div className="chat-app">
      {/* Conversation List */}
      <aside className="conversation-list">
        <div className="conversation-header">
          <h3>Chats</h3>
          <button onClick={handleCreateGroup} title="Create Group">+</button>
        </div>
        {conversations.map((conv) => (
          <div
            key={conv.conversationID}
            className={`conversation-item ${
              conv.conversationID === activeConversation ? 'active' : ''
            }`}
            onClick={() => setActiveConversation(conv.conversationID)}
          >
            <div className="conv-name">
              {conv.groupProfile?.name ||
                conv.userProfile?.nick ||
                conv.userProfile?.userID ||
                conv.conversationID}
            </div>
            <div className="conv-last-msg">
              {conv.lastMessage?.messageForShow || ''}
            </div>
            {conv.unreadCount > 0 && (
              <span className="unread-badge">{conv.unreadCount}</span>
            )}
          </div>
        ))}
      </aside>

      {/* Message Area */}
      <main className="message-area">
        {activeConversation ? (
          <>
            <div className="message-list">
              {messages.map((msg) => (
                <div
                  key={msg.ID}
                  className={`message-bubble ${msg.flow === 'out' ? 'sent' : 'received'}`}
                >
                  <span className="message-sender">{msg.nick || msg.from}</span>
                  <div className="message-content">
                    {msg.type === 'TIMTextElem' && <p>{msg.payload.text}</p>}
                    {msg.type === 'TIMImageElem' && (
                      <img
                        src={msg.payload.imageInfoArray?.[1]?.url}
                        alt="Shared image"
                        className="message-image"
                      />
                    )}
                    {msg.type === 'TIMCustomElem' && (
                      <div className="custom-message">
                        {msg.payload.description}
                      </div>
                    )}
                  </div>
                  <span className="message-time">
                    {new Date(msg.time * 1000).toLocaleTimeString()}
                  </span>
                </div>
              ))}
              <div ref={messagesEndRef} />
            </div>

            {/* Input Area */}
            <form className="message-input" onSubmit={handleSend}>
              <button
                type="button"
                className="btn-attach"
                onClick={() => fileInputRef.current?.click()}
              >
                📎
              </button>
              <input
                ref={fileInputRef}
                type="file"
                accept="image/*"
                onChange={handleImageUpload}
                hidden
              />
              <input
                type="text"
                value={inputText}
                onChange={(e) => setInputText(e.target.value)}
                placeholder="Type a message..."
                autoFocus
              />
              <button type="submit" disabled={!inputText.trim()}>
                Send
              </button>
            </form>
          </>
        ) : (
          <div className="no-conversation">
            Select a conversation to start chatting
          </div>
        )}
      </main>
    </div>
  );
}
Add the entry point:
// src/App.tsx
import React, { useState } from 'react';
import { ChatApp } from './components/ChatApp';
import './App.css';

function App() {
  const [userID, setUserID] = useState('');
  const [isJoined, setIsJoined] = useState(false);

  if (!isJoined) {
    return (
      <div className="login-screen">
        <h1>Chat Demo</h1>
        <input
          type="text"
          placeholder="Enter your User ID"
          value={userID}
          onChange={(e) => setUserID(e.target.value)}
        />
        <button onClick={() => setIsJoined(true)} disabled={!userID.trim()}>
          Join Chat
        </button>
      </div>
    );
  }

  return <ChatApp userID={userID} />;
}

export default App;
Add basic styling:
/* src/App.css */
.chat-app {
  display: flex;
  height: 100vh;
  font-family: -apple-system, BlinkMacSystemFont, 'Segoe UI', sans-serif;
}

.conversation-list {
  width: 300px;
  border-right: 1px solid #e0e0e0;
  overflow-y: auto;
  background: #f8f9fa;
}

.conversation-header {
  display: flex;
  justify-content: space-between;
  align-items: center;
  padding: 16px;
  border-bottom: 1px solid #e0e0e0;
}

.conversation-item {
  padding: 12px 16px;
  cursor: pointer;
  border-bottom: 1px solid #f0f0f0;
  position: relative;
}

.conversation-item:hover { background: #e8f4fd; }
.conversation-item.active { background: #d4edfc; }

.conv-name { font-weight: 600; font-size: 14px; }
.conv-last-msg { font-size: 12px; color: #666; margin-top: 4px; }

.unread-badge {
  position: absolute;
  right: 12px;
  top: 50%;
  transform: translateY(-50%);
  background: #ff4444;
  color: white;
  border-radius: 10px;
  padding: 2px 8px;
  font-size: 11px;
}

.message-area {
  flex: 1;
  display: flex;
  flex-direction: column;
}

.message-list {
  flex: 1;
  overflow-y: auto;
  padding: 16px;
}

.message-bubble {
  max-width: 60%;
  margin-bottom: 12px;
  padding: 10px 14px;
  border-radius: 12px;
}

.message-bubble.sent {
  margin-left: auto;
  background: #007aff;
  color: white;
  border-bottom-right-radius: 4px;
}

.message-bubble.received {
  background: #e9ecef;
  border-bottom-left-radius: 4px;
}

.message-sender { font-size: 11px; opacity: 0.7; display: block; }
.message-time { font-size: 10px; opacity: 0.6; display: block; margin-top: 4px; }
.message-image { max-width: 200px; border-radius: 8px; }

.message-input {
  display: flex;
  padding: 12px;
  border-top: 1px solid #e0e0e0;
  gap: 8px;
}

.message-input input[type="text"] {
  flex: 1;
  padding: 10px 14px;
  border: 1px solid #ddd;
  border-radius: 20px;
  outline: none;
}

.message-input button[type="submit"] {
  padding: 10px 20px;
  background: #007aff;
  color: white;
  border: none;
  border-radius: 20px;
  cursor: pointer;
}

.message-input button[type="submit"]:disabled {
  opacity: 0.5;
  cursor: not-allowed;
}

.no-conversation {
  flex: 1;
  display: flex;
  align-items: center;
  justify-content: center;
  color: #999;
}

.login-screen {
  display: flex;
  flex-direction: column;
  align-items: center;
  justify-content: center;
  height: 100vh;
  gap: 16px;
}

.login-screen input {
  padding: 12px 16px;
  border: 1px solid #ddd;
  border-radius: 8px;
  width: 250px;
}

.login-screen button {
  padding: 12px 24px;
  background: #007aff;
  color: white;
  border: none;
  border-radius: 8px;
  cursor: pointer;
}
Run the React app:
npm startOpen two browser windows, log in as different users (e.g., user_001 and user_002), and start a conversation. Messages appear in real-time.
Step 4: Integrate the Mobile SDK (Flutter)
Flutter is the primary mobile platform in this tutorial because it provides cross-platform coverage for both iOS and Android from a single codebase. We also provide native iOS and Android code blocks for teams that prefer platform-specific implementations.
4.1 Flutter Setup
Add the TRTC Chat SDK to your Flutter project:
# pubspec.yaml
name: my_chat_app
description: A real-time chat application powered by TRTC

environment:
  sdk: '>=3.0.0 <4.0.0'
  flutter: '>=3.10.0'

dependencies:
  flutter:
    sdk: flutter
  tencent_cloud_chat_sdk: ^2.0.0
  tencent_cloud_chat_push: ^1.0.0
  http: ^1.1.0
  provider: ^6.0.5

dev_dependencies:
  flutter_test:
    sdk: flutter
  flutter_lints: ^3.0.0
Run flutter pub get to install dependencies.
4.2 Initialize and Login
// lib/services/chat_service.dart
import 'dart:convert';
import 'package:http/http.dart' as http;
import 'package:tencent_cloud_chat_sdk/tencent_cloud_chat_sdk.dart';

class ChatService {
  static final ChatService _instance = ChatService._internal();
  factory ChatService() => _instance;
  ChatService._internal();

  static const int sdkAppID = 1600000001; // Replace with your SDKAppID
  static const String tokenServerUrl = 'http://10.0.2.2:3001'; // Android emulator
  // Use 'http://localhost:3001' for iOS simulator

  bool _isInitialized = false;
  bool _isLoggedIn = false;

  bool get isLoggedIn => _isLoggedIn;

  /// Initialize the Chat SDK
  Future<bool> init() async {
    if (_isInitialized) return true;

    V2TimSDKListener sdkListener = V2TimSDKListener(
      onConnecting: () => print('[SDK] Connecting...'),
      onConnectSuccess: () => print('[SDK] Connected'),
      onConnectFailed: (code, error) => print('[SDK] Connect failed: $code $error'),
      onKickedOffline: () => print('[SDK] Kicked offline'),
      onUserSigExpired: () => print('[SDK] UserSig expired - need to refresh'),
    );

    V2TimValueCallback<bool> initResult = await TencentImSDKPlugin.v2TIMManager.initSDK(
      sdkAppID: sdkAppID,
      loglevel: LogLevelEnum.V2TIM_LOG_INFO,
      listener: sdkListener,
    );

    if (initResult.code == 0) {
      _isInitialized = true;
      print('[SDK] Initialized successfully');
      return true;
    } else {
      print('[SDK] Init failed: ${initResult.code} ${initResult.desc}');
      return false;
    }
  }

  /// Fetch UserSig from the token server
  Future<String?> _fetchUserSig(String userID) async {
    try {
      final response = await http.post(
        Uri.parse('$tokenServerUrl/api/auth/usersig'),
        headers: {'Content-Type': 'application/json'},
        body: jsonEncode({'userID': userID}),
      );

      if (response.statusCode == 200) {
        final data = jsonDecode(response.body);
        return data['userSig'] as String;
      } else {
        print('[Auth] Failed to get UserSig: ${response.statusCode}');
        return null;
      }
    } catch (e) {
      print('[Auth] Token server error: $e');
      return null;
    }
  }

  /// Login with userID
  Future<bool> login(String userID) async {
    if (!_isInitialized) {
      final initialized = await init();
      if (!initialized) return false;
    }

    final userSig = await _fetchUserSig(userID);
    if (userSig == null) return false;

    V2TimCallback loginResult = await TencentImSDKPlugin.v2TIMManager.login(
      userID: userID,
      userSig: userSig,
    );

    if (loginResult.code == 0) {
      _isLoggedIn = true;
      print('[SDK] Logged in as: $userID');
      return true;
    } else {
      print('[SDK] Login failed: ${loginResult.code} ${loginResult.desc}');
      return false;
    }
  }

  /// Logout
  Future<void> logout() async {
    await TencentImSDKPlugin.v2TIMManager.logout();
    _isLoggedIn = false;
  }
}
4.3 Send and Receive Messages
// lib/services/message_service.dart
import 'package:tencent_cloud_chat_sdk/tencent_cloud_chat_sdk.dart';

class MessageService {
  /// Send a text message to a user (C2C) or group
  Future<V2TimMessage?> sendTextMessage({
    required String text,
    required String receiver,
    String? groupID,
  }) async {
    // Create the message
    V2TimValueCallback<V2TimMsgCreateInfoResult> createResult =
        await TencentImSDKPlugin.v2TIMManager.getMessageManager().createTextMessage(
      text: text,
    );

    if (createResult.code != 0) {
      print('[Message] Create failed: ${createResult.code}');
      return null;
    }

    String? msgID = createResult.data?.id;
    if (msgID == null) return null;

    // Send the message
    V2TimValueCallback<V2TimMessage> sendResult =
        await TencentImSDKPlugin.v2TIMManager.getMessageManager().sendMessage(
      id: msgID,
      receiver: groupID == null ? receiver : '',
      groupID: groupID ?? '',
    );

    if (sendResult.code == 0) {
      print('[Message] Sent successfully');
      return sendResult.data;
    } else {
      print('[Message] Send failed: ${sendResult.code} ${sendResult.desc}');
      return null;
    }
  }

  /// Send an image message
  Future<V2TimMessage?> sendImageMessage({
    required String imagePath,
    required String receiver,
    String? groupID,
  }) async {
    V2TimValueCallback<V2TimMsgCreateInfoResult> createResult =
        await TencentImSDKPlugin.v2TIMManager.getMessageManager().createImageMessage(
      imagePath: imagePath,
    );

    if (createResult.code != 0) return null;

    String? msgID = createResult.data?.id;
    if (msgID == null) return null;

    V2TimValueCallback<V2TimMessage> sendResult =
        await TencentImSDKPlugin.v2TIMManager.getMessageManager().sendMessage(
      id: msgID,
      receiver: groupID == null ? receiver : '',
      groupID: groupID ?? '',
    );

    return sendResult.code == 0 ? sendResult.data : null;
  }

  /// Listen for incoming messages
  void addMessageListener(void Function(List<V2TimMessage>) onReceive) {
    TencentImSDKPlugin.v2TIMManager.getMessageManager().addAdvancedMsgListener(
      listener: V2TimAdvancedMsgListener(
        onRecvNewMessage: (V2TimMessage message) {
          onReceive([message]);
        },
      ),
    );
  }

  /// Get message history for a conversation
  Future<List<V2TimMessage>> getHistory({
    required String conversationID,
    int count = 20,
    V2TimMessage? lastMessage,
  }) async {
    // Determine if it's a C2C or Group conversation
    bool isGroup = conversationID.startsWith('group_');
    String peerOrGroup = conversationID.replaceFirst(RegExp(r'^(c2c_|group_)'), '');

    V2TimValueCallback<List<V2TimMessage>> result;

    if (isGroup) {
      result = await TencentImSDKPlugin.v2TIMManager.getMessageManager().getGroupHistoryMessageList(
        groupID: peerOrGroup,
        count: count,
        lastMsgID: lastMessage?.msgID,
      );
    } else {
      result = await TencentImSDKPlugin.v2TIMManager.getMessageManager().getC2CHistoryMessageList(
        userID: peerOrGroup,
        count: count,
        lastMsgID: lastMessage?.msgID,
      );
    }

    return result.data ?? [];
  }
}
4.4 Create Group Chats in Flutter
// lib/services/group_service.dart
import 'package:tencent_cloud_chat_sdk/tencent_cloud_chat_sdk.dart';

class GroupService {
  /// Create a group
  Future<String?> createGroup({
    required String groupName,
    required List<String> memberIDs,
    String groupType = 'Work', // Work, Public, Meeting, AVChatRoom
  }) async {
    List<V2TimGroupMember> members = memberIDs
        .map((id) => V2TimGroupMember(userID: id, role: GroupMemberRoleTypeEnum.V2TIM_GROUP_MEMBER_ROLE_MEMBER))
        .toList();

    V2TimValueCallback<String> result =
        await TencentImSDKPlugin.v2TIMManager.getGroupManager().createGroup(
      groupType: groupType,
      groupName: groupName,
      memberList: members,
    );

    if (result.code == 0) {
      print('[Group] Created: ${result.data}');
      return result.data;
    } else {
      print('[Group] Create failed: ${result.code} ${result.desc}');
      return null;
    }
  }

  /// Join a group
  Future<bool> joinGroup(String groupID, {String message = ''}) async {
    V2TimCallback result = await TencentImSDKPlugin.v2TIMManager.joinGroup(
      groupID: groupID,
      message: message,
    );
    return result.code == 0;
  }

  /// Get group info
  Future<V2TimGroupInfoResult?> getGroupInfo(String groupID) async {
    V2TimValueCallback<List<V2TimGroupInfoResult>> result =
        await TencentImSDKPlugin.v2TIMManager.getGroupManager().getGroupsInfo(
      groupIDList: [groupID],
    );
    return result.data?.isNotEmpty == true ? result.data!.first : null;
  }
}
4.5 iOS Native Code (Swift)
For teams using native iOS development:
// AppDelegate.swift - SDK Initialization
import UIKit
import ImSDK_Plus

@main
class AppDelegate: UIResponder, UIApplicationDelegate {

    let SDKAppID: Int32 = 1600000001 // Replace with your SDKAppID

    func application(
        _ application: UIApplication,
        didFinishLaunchingWithOptions launchOptions: [UIApplication.LaunchOptionsKey: Any]?
    ) -> Bool {
        initTRTCChat()
        return true
    }

    private func initTRTCChat() {
        let config = V2TIMSDKConfig()
        config.logLevel = .LOG_INFO

        V2TIMManager.sharedInstance().initSDK(
            SDKAppID,
            config: config,
            listener: self
        )
    }
}

extension AppDelegate: V2TIMSDKListener {
    func onConnecting() { print("[SDK] Connecting...") }
    func onConnectSuccess() { print("[SDK] Connected") }
    func onConnectFailed(_ code: Int32, err: String?) {
        print("[SDK] Connect failed: \(code) \(err ?? "")")
    }
}

// ChatManager.swift - Login and Messaging
class ChatManager {
    static let shared = ChatManager()

    func login(userID: String, userSig: String, completion: @escaping (Bool) -> Void) {
        V2TIMManager.sharedInstance().login(userID, userSig: userSig) {
            print("[SDK] Login success")
            completion(true)
        } fail: { code, desc in
            print("[SDK] Login failed: \(code) \(desc ?? "")")
            completion(false)
        }
    }

    func sendTextMessage(to userID: String, text: String) {
        V2TIMManager.sharedInstance().sendC2CTextMessage(text, to: userID) {
            print("[Message] Sent")
        } fail: { code, desc in
            print("[Message] Failed: \(code) \(desc ?? "")")
        }
    }

    func sendGroupMessage(groupID: String, text: String) {
        V2TIMManager.sharedInstance().sendGroupTextMessage(
            text,
            to: groupID,
            priority: .PRIORITY_NORMAL
        ) {
            print("[Group Message] Sent")
        } fail: { code, desc in
            print("[Group Message] Failed: \(code) \(desc ?? "")")
        }
    }
}
4.6 Android Native Code (Kotlin)
For teams using native Android development:
// ChatApplication.kt - SDK Initialization
package com.example.mychatapp

import android.app.Application
import com.tencent.imsdk.v2.V2TIMManager
import com.tencent.imsdk.v2.V2TIMSDKConfig
import com.tencent.imsdk.v2.V2TIMSDKListener
import com.tencent.imsdk.v2.V2TIMLogLevel

class ChatApplication : Application() {

    companion object {
        const val SDK_APP_ID = 1600000001 // Replace with your SDKAppID
    }

    override fun onCreate() {
        super.onCreate()
        initChat()
    }

    private fun initChat() {
        val config = V2TIMSDKConfig().apply {
            logLevel = V2TIMLogLevel.V2TIM_LOG_INFO
        }

        V2TIMManager.getInstance().initSDK(
            this,
            SDK_APP_ID,
            config,
            object : V2TIMSDKListener() {
                override fun onConnecting() = println("[SDK] Connecting...")
                override fun onConnectSuccess() = println("[SDK] Connected")
                override fun onConnectFailed(code: Int, error: String?) {
                    println("[SDK] Connect failed: $code $error")
                }
            }
        )
    }
}

// ChatManager.kt - Login and Messaging
package com.example.mychatapp

import com.tencent.imsdk.v2.*

object ChatManager {

    fun login(userID: String, userSig: String, callback: (Boolean) -> Unit) {
        V2TIMManager.getInstance().login(userID, userSig, object : V2TIMCallback {
            override fun onSuccess() {
                println("[SDK] Login success")
                callback(true)
            }
            override fun onError(code: Int, desc: String?) {
                println("[SDK] Login failed: $code $desc")
                callback(false)
            }
        })
    }

    fun sendTextMessage(to: String, text: String) {
        V2TIMManager.getInstance().sendC2CTextMessage(
            text, to,
            object : V2TIMValueCallback<V2TIMMessage> {
                override fun onSuccess(msg: V2TIMMessage?) {
                    println("[Message] Sent")
                }
                override fun onError(code: Int, desc: String?) {
                    println("[Message] Failed: $code $desc")
                }
            }
        )
    }

    fun sendGroupMessage(groupID: String, text: String) {
        V2TIMManager.getInstance().sendGroupTextMessage(
            text, groupID, V2TIMMessage.V2TIM_PRIORITY_NORMAL,
            object : V2TIMValueCallback<V2TIMMessage> {
                override fun onSuccess(msg: V2TIMMessage?) {
                    println("[Group Message] Sent")
                }
                override fun onError(code: Int, desc: String?) {
                    println("[Group Message] Failed: $code $desc")
                }
            }
        )
    }
}
Step 5: Enable Offline Push Notifications
5.1 Why Push Notifications Matter
When your app is in the background or the device screen is off, the WebSocket connection to TRTC servers is severed. Without push notifications, users miss messages entirely until they reopen the app. Offline push ensures message delivery regardless of app state.
TRTC's push architecture works as follows:
- Message arrives at TRTC server
- Server detects recipient is offline
- Server routes message to platform-specific push service (APNs/FCM)
- Push service delivers notification to device
- User taps notification, app opens to the conversation
5.2 Configure APNs (iOS)
Step A: Generate APNs Certificate
- Log in to Apple Developer Portal
- Navigate to Certificates, Identifiers & Profiles
- Select your App ID, enable Push Notifications
- Create a Push Notification certificate (Development + Production)
- Download the
.cerfile, open in Keychain Access - Export as
.p12file with a password
Step B: Upload to TRTC Console
- Go to your TRTC Console → App → Push Configuration
- Select iOS
- Upload the
.p12certificate for both Development and Production - Enter the certificate password
- Note the Certificate ID returned — you need it in your code
Step C: iOS Code Integration
// AppDelegate.swift - Push Registration
import UserNotifications
import ImSDK_Plus

extension AppDelegate: UNUserNotificationCenterDelegate {

    func registerForPush() {
        UNUserNotificationCenter.current().delegate = self
        UNUserNotificationCenter.current().requestAuthorization(
            options: [.alert, .badge, .sound]
        ) { granted, error in
            if granted {
                DispatchQueue.main.async {
                    UIApplication.shared.registerForRemoteNotifications()
                }
            }
        }
    }

    func application(
        _ application: UIApplication,
        didRegisterForRemoteNotificationsWithDeviceToken deviceToken: Data
    ) {
        // Convert token to string
        let tokenString = deviceToken.map { String(format: "%02.2hhx", $0) }.joined()
        print("[Push] APNs token: \(tokenString)")

        // Report token to TRTC
        let param = V2TIMAPNSConfig()
        param.businessID = 12345 // Certificate ID from TRTC Console
        param.token = deviceToken

        V2TIMManager.sharedInstance().setAPNS(param) {
            print("[Push] APNs token registered with TRTC")
        } fail: { code, desc in
            print("[Push] APNs registration failed: \(code) \(desc ?? "")")
        }
    }

    // Handle notification when app is in foreground
    func userNotificationCenter(
        _ center: UNUserNotificationCenter,
        willPresent notification: UNNotification,
        withCompletionHandler completionHandler: @escaping (UNNotificationPresentationOptions) -> Void
    ) {
        completionHandler([.banner, .sound, .badge])
    }

    // Handle notification tap
    func userNotificationCenter(
        _ center: UNUserNotificationCenter,
        didReceive response: UNNotificationResponse,
        withCompletionHandler completionHandler: @escaping () -> Void
    ) {
        let userInfo = response.notification.request.content.userInfo
        // Navigate to the conversation based on userInfo
        if let ext = userInfo["ext"] as? String {
            // Parse ext to get conversationID and navigate
            print("[Push] Tapped notification with ext: \(ext)")
        }
        completionHandler()
    }
}
5.3 Configure FCM (Android)
Step A: Set Up Firebase
- Go to Firebase Console
- Create a project or select an existing one
- Add an Android app with your package name
- Download
google-services.jsonand place it inandroid/app/ - Add Firebase dependencies to your
build.gradlefiles
Step B: Get Server Key
- In Firebase Console → Project Settings → Cloud Messaging
- Copy the Server Key (or use the newer FCM v1 API credentials)
Step C: Upload to TRTC Console
- Go to your TRTC Console → App → Push Configuration
- Select Android
- Select FCM as the push channel
- Paste the Server Key
- Note the Certificate ID
Step D: Android Code Integration
// MyFirebaseService.kt
package com.example.mychatapp

import com.google.firebase.messaging.FirebaseMessagingService
import com.google.firebase.messaging.RemoteMessage
import com.tencent.imsdk.v2.V2TIMManager
import com.tencent.imsdk.v2.V2TIMCallback
import com.tencent.imsdk.v2.V2TIMOfflinePushConfig

class MyFirebaseService : FirebaseMessagingService() {

    override fun onNewToken(token: String) {
        super.onNewToken(token)
        println("[Push] FCM token: $token")
        registerPushToken(token)
    }

    override fun onMessageReceived(message: RemoteMessage) {
        super.onMessageReceived(message)
        // TRTC SDK handles message parsing automatically
        // Custom notification display logic here if needed
        println("[Push] Received: ${message.data}")
    }

    private fun registerPushToken(token: String) {
        val config = V2TIMOfflinePushConfig().apply {
            businessID = 67890L // Certificate ID from TRTC Console
            this.token = token
            isTPNSToken = false
        }

        V2TIMManager.getOfflinePushManager().setOfflinePushConfig(
            config,
            object : V2TIMCallback {
                override fun onSuccess() {
                    println("[Push] FCM token registered with TRTC")
                }
                override fun onError(code: Int, desc: String?) {
                    println("[Push] FCM registration failed: $code $desc")
                }
            }
        )
    }
}
Register the service in AndroidManifest.xml:
<service
    android:name=".MyFirebaseService"
    android:exported="false">
    <intent-filter>
        <action android:name="com.google.firebase.MESSAGING_EVENT" />
    </intent-filter>
</service>
5.4 Flutter Push Integration
// lib/services/push_service.dart
import 'package:tencent_cloud_chat_push/tencent_cloud_chat_push.dart';
import 'package:tencent_cloud_chat_sdk/tencent_cloud_chat_sdk.dart';

class PushService {
  static final PushService _instance = PushService._internal();
  factory PushService() => _instance;
  PushService._internal();

  /// Initialize push notifications after login
  Future<void> init() async {
    // Register push plugin
    TencentCloudChatPush().registerPush(
      onNotificationClicked: _onNotificationClicked,
    );

    print('[Push] Push service initialized');
  }

  /// Handle notification tap - navigate to conversation
  void _onNotificationClicked({required String ext, String? userID, String? groupID}) {
    print('[Push] Notification clicked - ext: $ext, user: $userID, group: $groupID');
    // Navigate to the appropriate conversation screen
    // Use your app's navigation service here
  }

  /// Set custom push configuration for a specific message
  static V2TimOfflinePushInfo createPushInfo({
    required String title,
    required String description,
    String? ext,
  }) {
    return V2TimOfflinePushInfo(
      title: title,
      desc: description,
      ext: ext ?? '',
      disablePush: false,
      iOSSound: 'default',
      ignoreIOSBadge: false,
    );
  }
}
5.5 Test Push Notifications
To verify push is working:
- Build a release version of your app (debug builds may not receive push reliably)
- Install on a physical device (push does not work on simulators for APNs)
- Log in as User A
- Put the app in the background (or kill it)
- From another device or the web app, send a message to User A
- Verify the push notification appears on the device
- Tap the notification and confirm the app opens to the correct conversation
Common issues and fixes:
- No notification: Check certificate IDs match between console and code
- Notification appears but no content: Verify offline push info is set on messages
- Tap does nothing: Ensure your notification click handler parses the
extfield correctly
Step 6: Add UIKit (The 5-Minute Solution)
6.1 What is UIKit?
TRTC UIKit is a collection of pre-built, production-ready UI components that handle the entire chat interface. Instead of building conversation lists, message bubbles, input bars, and media viewers from scratch, you drop in UIKit components and have a complete chat UI in minutes.
UIKit includes:
- Conversation list with unread badges and last message preview
- Message thread with text, images, video, files, and voice messages
- Message input with rich media support and emoji picker
- Contact list and group management
- Message reactions, read receipts, and typing indicators
- Dark mode and theme customization
6.2 Web UIKit Integration (React)
Install the UIKit package:
npm install @tencentcloud/chat-uikit-reactReplace your entire custom chat UI with UIKit:
// src/components/ChatWithUIKit.tsx
import React from 'react';
import {
  UIKitProvider,
  ConversationList,
  Chat,
  MessageList,
  MessageInput,
  ChatHeader,
} from '@tencentcloud/chat-uikit-react';
import '@tencentcloud/chat-uikit-react/dist/cjs/index.css';

interface ChatUIKitProps {
  SDKAppID: number;
  userID: string;
  userSig: string;
}

export function ChatWithUIKit({ SDKAppID, userID, userSig }: ChatUIKitProps) {
  return (
    <UIKitProvider
      SDKAppID={SDKAppID}
      userID={userID}
      userSig={userSig}
      theme="light"
      language="en-US"
    >
      <div style={{ display: 'flex', height: '100vh' }}>
        {/* Left panel: Conversation List */}
        <div style={{ width: '320px', borderRight: '1px solid #e0e0e0' }}>
          <ConversationList />
        </div>

        {/* Right panel: Chat */}
        <div style={{ flex: 1, display: 'flex', flexDirection: 'column' }}>
          <Chat>
            <ChatHeader />
            <MessageList />
            <MessageInput />
          </Chat>
        </div>
      </div>
    </UIKitProvider>
  );
}
Connect it with authentication:
// src/App.tsx (UIKit version)
import React, { useState, useEffect } from 'react';
import { ChatWithUIKit } from './components/ChatWithUIKit';

const SDKAppID = parseInt(process.env.REACT_APP_SDK_APP_ID || '0', 10);
const TOKEN_SERVER = process.env.REACT_APP_TOKEN_SERVER || 'http://localhost:3001';

function App() {
  const [userID, setUserID] = useState('');
  const [userSig, setUserSig] = useState('');
  const [isReady, setIsReady] = useState(false);

  const handleLogin = async (id: string) => {
    const response = await fetch(`${TOKEN_SERVER}/api/auth/usersig`, {
      method: 'POST',
      headers: { 'Content-Type': 'application/json' },
      body: JSON.stringify({ userID: id }),
    });
    const data = await response.json();
    setUserID(id);
    setUserSig(data.userSig);
    setIsReady(true);
  };

  if (!isReady) {
    return (
      <div style={{ display: 'flex', flexDirection: 'column', alignItems: 'center', justifyContent: 'center', height: '100vh', gap: '16px' }}>
        <h1>Chat App</h1>
        <input
          placeholder="Enter User ID"
          value={userID}
          onChange={(e) => setUserID(e.target.value)}
          style={{ padding: '12px', borderRadius: '8px', border: '1px solid #ddd', width: '250px' }}
        />
        <button
          onClick={() => handleLogin(userID)}
          disabled={!userID}
          style={{ padding: '12px 24px', background: '#007aff', color: 'white', border: 'none', borderRadius: '8px', cursor: 'pointer' }}
        >
          Start Chatting
        </button>
      </div>
    );
  }

  return <ChatWithUIKit SDKAppID={SDKAppID} userID={userID} userSig={userSig} />;
}

export default App;
That's it. A full-featured chat UI running in under 30 lines of meaningful code.
6.3 Mobile UIKit Integration (Flutter)
# Add to pubspec.yaml dependencies
dependencies:
  tencent_cloud_chat_uikit: ^2.0.0
// lib/screens/chat_screen.dart
import 'package:flutter/material.dart';
import 'package:tencent_cloud_chat_uikit/tencent_cloud_chat_uikit.dart';
class ChatScreen extends StatelessWidget {
final int sdkAppID;
final String userID;
final String userSig;
const ChatScreen({
Key? key,
required this.sdkAppID,
required this.userID,
required this.userSig,
}) : super(key: key);
@override
Widget build(BuildContext context) {
return TIMUIKitCore(
sdkAppID: sdkAppID,
userID: userID,
userSig: userSig,
child: const ChatHome(),
);
}
}
class ChatHome extends StatefulWidget {
const ChatHome({Key? key}) : super(key: key);
@override
State<ChatHome> createState() => _ChatHomeState();
}
class _ChatHomeState extends State<ChatHome> {
int _currentIndex = 0;
@override
Widget build(BuildContext context) {
return Scaffold(
body: IndexedStack(
index: _currentIndex,
children: [
// Conversation list tab
TIMUIKitConversation(
onTapItem: (V2TimConversation conversation) {
Navigator.push(
context,
MaterialPageRoute(
builder: (context) => ChatDetailScreen(
conversationID: conversation.conversationID ?? '',
conversationName: conversation.showName ?? 'Chat',
),
),
);
},
),
// Contacts tab
TIMUIKitContact(
onTapItem: (V2TimFriendInfo friend) {
Navigator.push(
context,
MaterialPageRoute(
builder: (context) => ChatDetailScreen(
conversationID: 'c2c_${friend.userID}',
conversationName: friend.friendRemark ?? friend.userID ?? '',
),
),
);
},
),
],
),
bottomNavigationBar: BottomNavigationBar(
currentIndex: _currentIndex,
onTap: (index) => setState(() => _currentIndex = index),
items: const [
BottomNavigationBarItem(icon: Icon(Icons.chat), label: 'Chats'),
BottomNavigationBarItem(icon: Icon(Icons.contacts), label: 'Contacts'),
],
),
);
}
}
class ChatDetailScreen extends StatelessWidget {
final String conversationID;
final String conversationName;
const ChatDetailScreen({
Key? key,
required this.conversationID,
required this.conversationName,
}) : super(key: key);
@override
Widget build(BuildContext context) {
return Scaffold(
appBar: AppBar(title: Text(conversationName)),
body: TIMUIKitChat(
conversationID: conversationID,
conversationShowName: conversationName,
),
);
}
}6.4 Customize Theme and Styles
UIKit supports deep customization without forking the source:
// React theme customization
<UIKitProvider
  SDKAppID={SDKAppID}
  userID={userID}
  userSig={userSig}
  theme="dark" // 'light' | 'dark'
  language="en-US" // 'en-US' | 'zh-CN' | 'ja-JP' | 'ko-KR'
>
  {/* children */}
</UIKitProvider>
For CSS-level customization, override the UIKit CSS variables:
/* Override UIKit theme variables */
:root {
  --uikit-primary-color: #6366f1;
  --uikit-bg-color: #1a1a2e;
  --uikit-text-color: #e0e0e0;
  --uikit-border-color: #2d2d44;
  --uikit-bubble-self: #4f46e5;
  --uikit-bubble-other: #2d2d44;
  --uikit-font-family: 'Inter', sans-serif;
  --uikit-border-radius: 12px;
}
Flutter theme customization:
TIMUIKitCore(
  sdkAppID: sdkAppID,
  userID: userID,
  userSig: userSig,
  theme: TUITheme(
    primaryColor: const Color(0xFF6366F1),
    backgroundColor: const Color(0xFF1A1A2E),
    textColor: const Color(0xFFE0E0E0),
    dividerColor: const Color(0xFF2D2D44),
    chatBubbleSelfBgColor: const Color(0xFF4F46E5),
    chatBubbleOtherBgColor: const Color(0xFF2D2D44),
  ),
  child: const ChatHome(),
);
Step 7: Production Checklist
Before deploying your chat application to production, work through every item on this checklist:
Security
Reliability
// Example reconnection logic
const chat = getChatSDK();

chat.on(TencentCloudChat.EVENT.SDK_NOT_READY, () => {
  console.warn('SDK disconnected - attempting reconnection');
  // SDK auto-reconnects, but you may want to show UI state
});

chat.on(TencentCloudChat.EVENT.SDK_READY, () => {
  console.log('SDK reconnected - syncing messages');
  // Refresh conversation list and current chat
});
Push Notifications
Performance
Storage and Data
Testing
Monitoring
Accelerate Development with MCP
For teams using AI-assisted development workflows, the @tencent-rtc/mcp@latest package provides Model Context Protocol integration. This allows AI coding assistants to directly query TRTC documentation, generate SDK code snippets, and troubleshoot integration issues within your IDE.
npm install @tencent-rtc/mcp@latestMCP integration means your development assistant can:
- Look up API methods and parameters from TRTC documentation in real-time
- Generate correctly typed SDK calls based on natural language descriptions
- Debug error codes by cross-referencing the official error code reference
- Scaffold entire features (group management, push configuration) from high-level descriptions
This reduces integration time significantly — especially for teams new to the TRTC platform.
FAQ
1. How much does TRTC Chat cost?
TRTC offers a generous free tier: 1,000 monthly active users (MAU) with no concurrent connection limits and push notifications included. Beyond 1,000 MAU, pricing scales based on usage. Check the Free Chat API page for current pricing tiers.
2. What is UserSig and why can't I generate it on the client?
UserSig is an HMAC-SHA256 signature that authenticates a user's identity. It requires your SecretKey to generate. If you embed the SecretKey in client-side code, anyone can decompile your app and forge tokens for any user — gaining unauthorized access to your entire chat system. Always generate UserSig on a secure server that you control.
3. How many messages can I send per second?
There is no hard per-user rate limit for standard messages. Group messages in large groups (AVChatRoom) support up to 40 messages per second per group by default, with higher limits available on request. For 1-on-1 conversations, the practical limit is far beyond what any human can type.
4. Can I migrate from another chat provider (e.g., Firebase, Stream, SendBird)?
Yes. TRTC provides message import APIs for bulk migration. The typical process involves: exporting messages from your current provider, transforming the format to TRTC's message schema, and using the server-side REST API to import them. User accounts can be batch-created. Contact TRTC support for migration tooling assistance.
5. Does TRTC support end-to-end encryption?
TRTC encrypts all data in transit (TLS) and at rest. For application-level end-to-end encryption (where even TRTC servers cannot read messages), you can implement it as a custom layer on top — encrypting message payloads before sending and decrypting on receipt using custom message types. The platform does not natively provide E2EE out of the box.
6. How do I handle message delivery confirmation (read receipts)?
TRTC supports read receipts for both 1-on-1 and group messages. For C2C messages, call markC2CMessageAsRead when the user views the conversation. For groups, use sendMessageReadReceipts. The SDK fires MESSAGE_READ_RECEIPT_RECEIVED events that you can listen to for updating the UI.
// Mark messages as read
await chat.setMessageRead({ conversationID: 'C2Cuser_002' });

// Listen for read receipts
chat.on(TencentCloudChat.EVENT.MESSAGE_READ_RECEIPT_RECEIVED, (event) => {
  // Update UI to show double-check marks
});
7. What happens when a user is offline for more than 7 days?
On the free tier, messages are stored for 7 days. If a user returns after 7 days, messages older than the retention period are not available. Paid tiers extend storage to 30, 90, or 360 days. For critical applications, implement server-side message archival using TRTC's callback webhooks to store messages in your own database permanently.
8. Can I use TRTC Chat alongside TRTC's audio/video calling?
Absolutely — they are designed to work together. Many applications use Chat for messaging and TRTC's real-time communication SDK for voice/video calls within the same app. Both share the same SDKAppID and user authentication system. You can trigger a video call from within a chat conversation using signaling messages, creating a seamless experience similar to WhatsApp or WeChat.
Conclusion
You now have a complete, production-ready chat application running across Web and Mobile platforms. Here's what you accomplished:
- Set up credentials — SDKAppID and SecretKey from the TRTC Console
- Built a token server — secure UserSig generation with Express
- Integrated the Web SDK — full React implementation with messaging, groups, and history
- Integrated the Mobile SDK — Flutter cross-platform with native iOS/Android references
- Enabled push notifications — APNs and FCM configuration for offline delivery
- Added UIKit — pre-built UI components for rapid deployment
- Production hardened — security, reliability, and performance checklist
The Free Chat API gives you everything needed to build, test, and launch without upfront costs. For detailed API references and advanced features (message reactions, typing indicators, conversation pinning, message recall), refer to the TRTC Chat Documentation.
Start building now — your first message is minutes away.