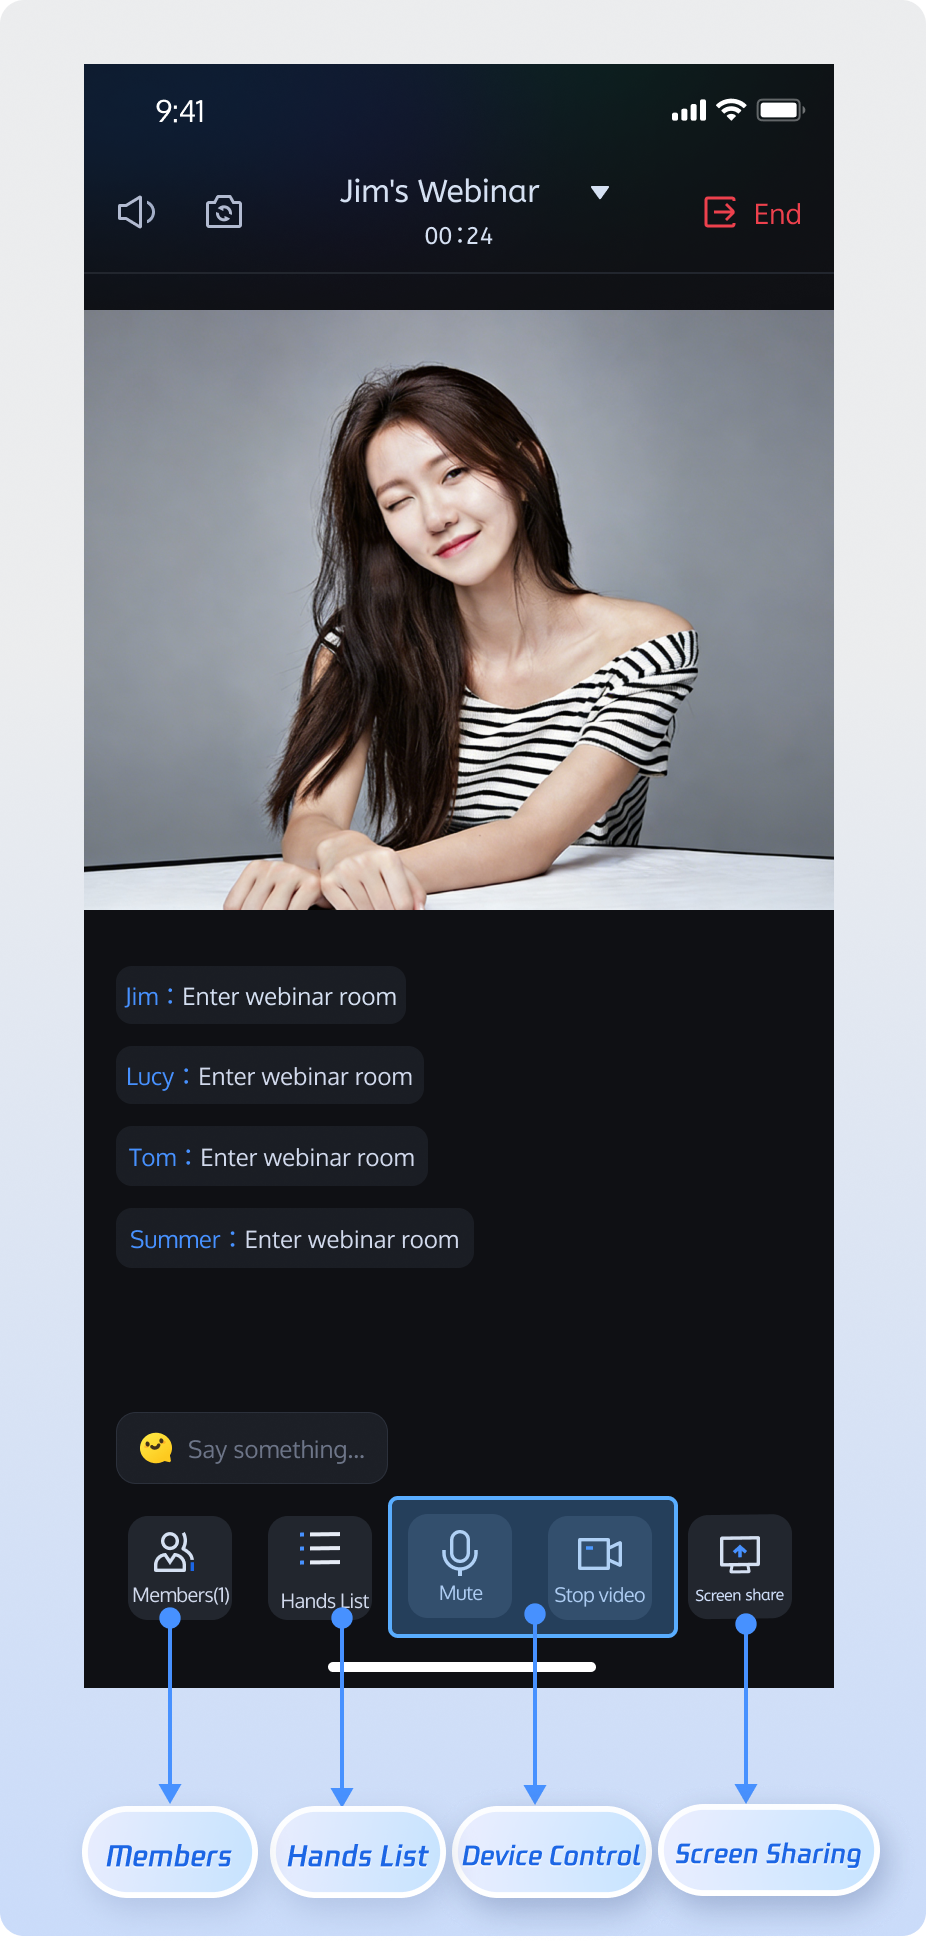
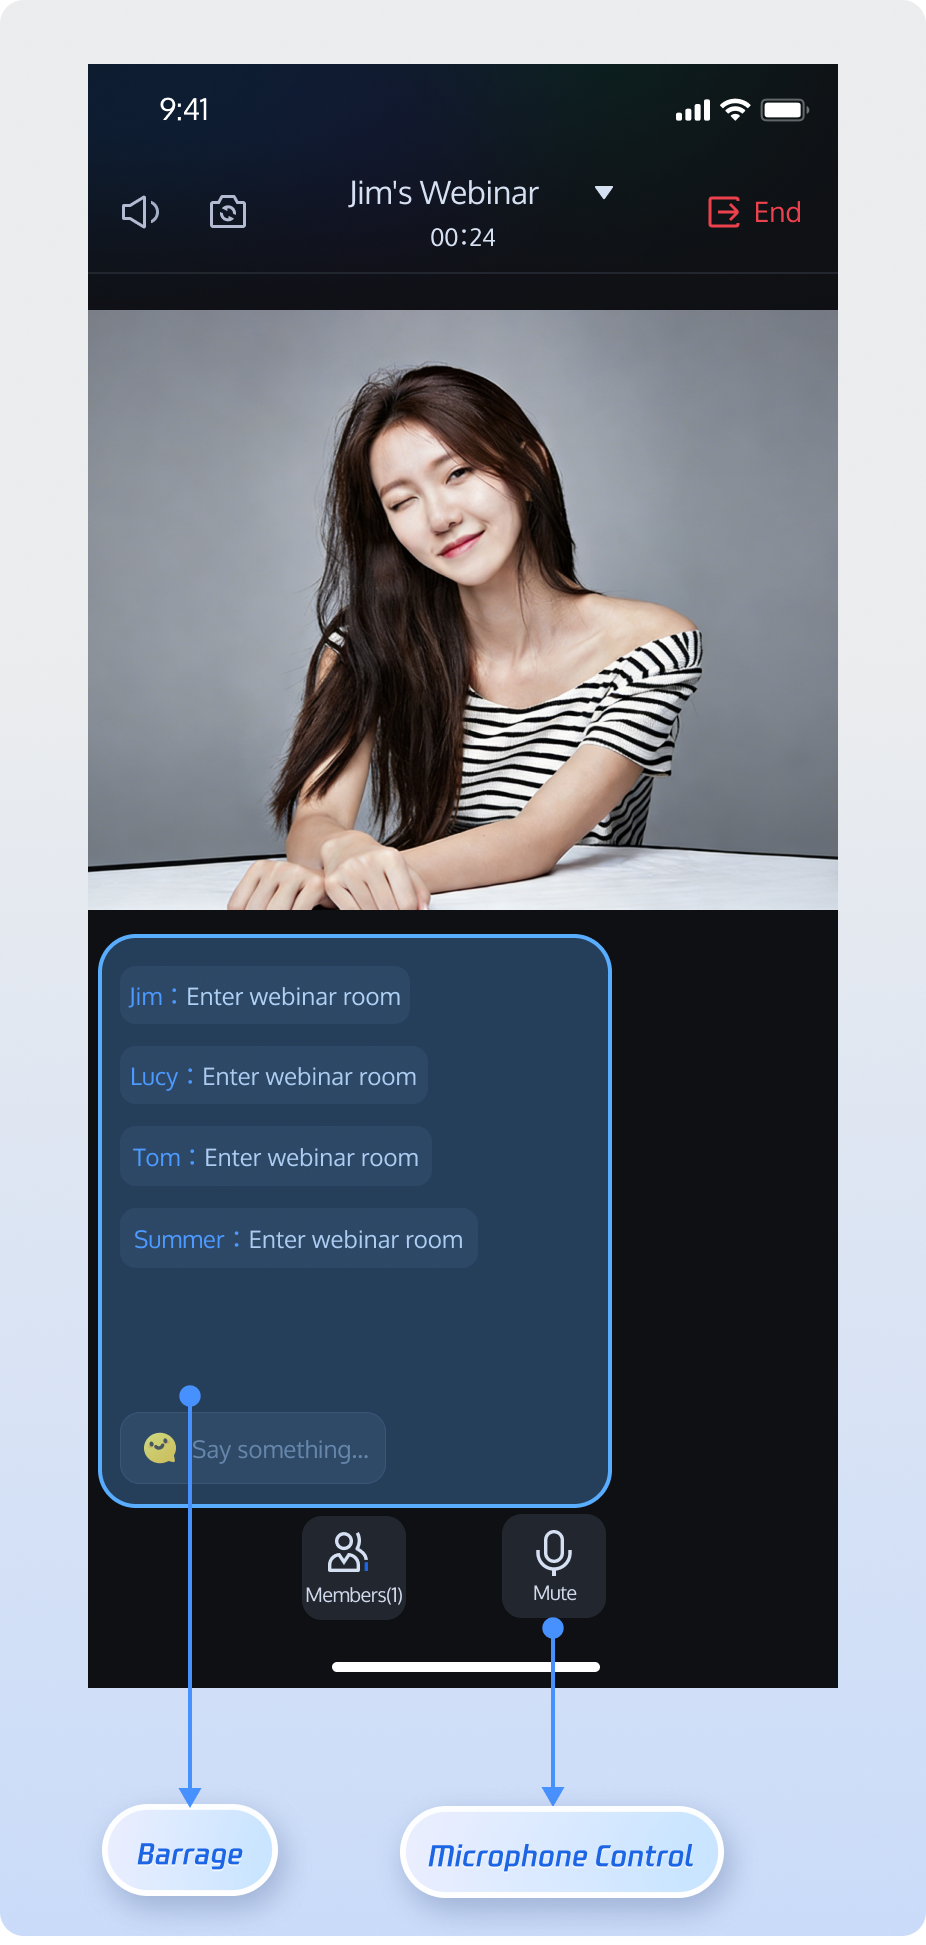
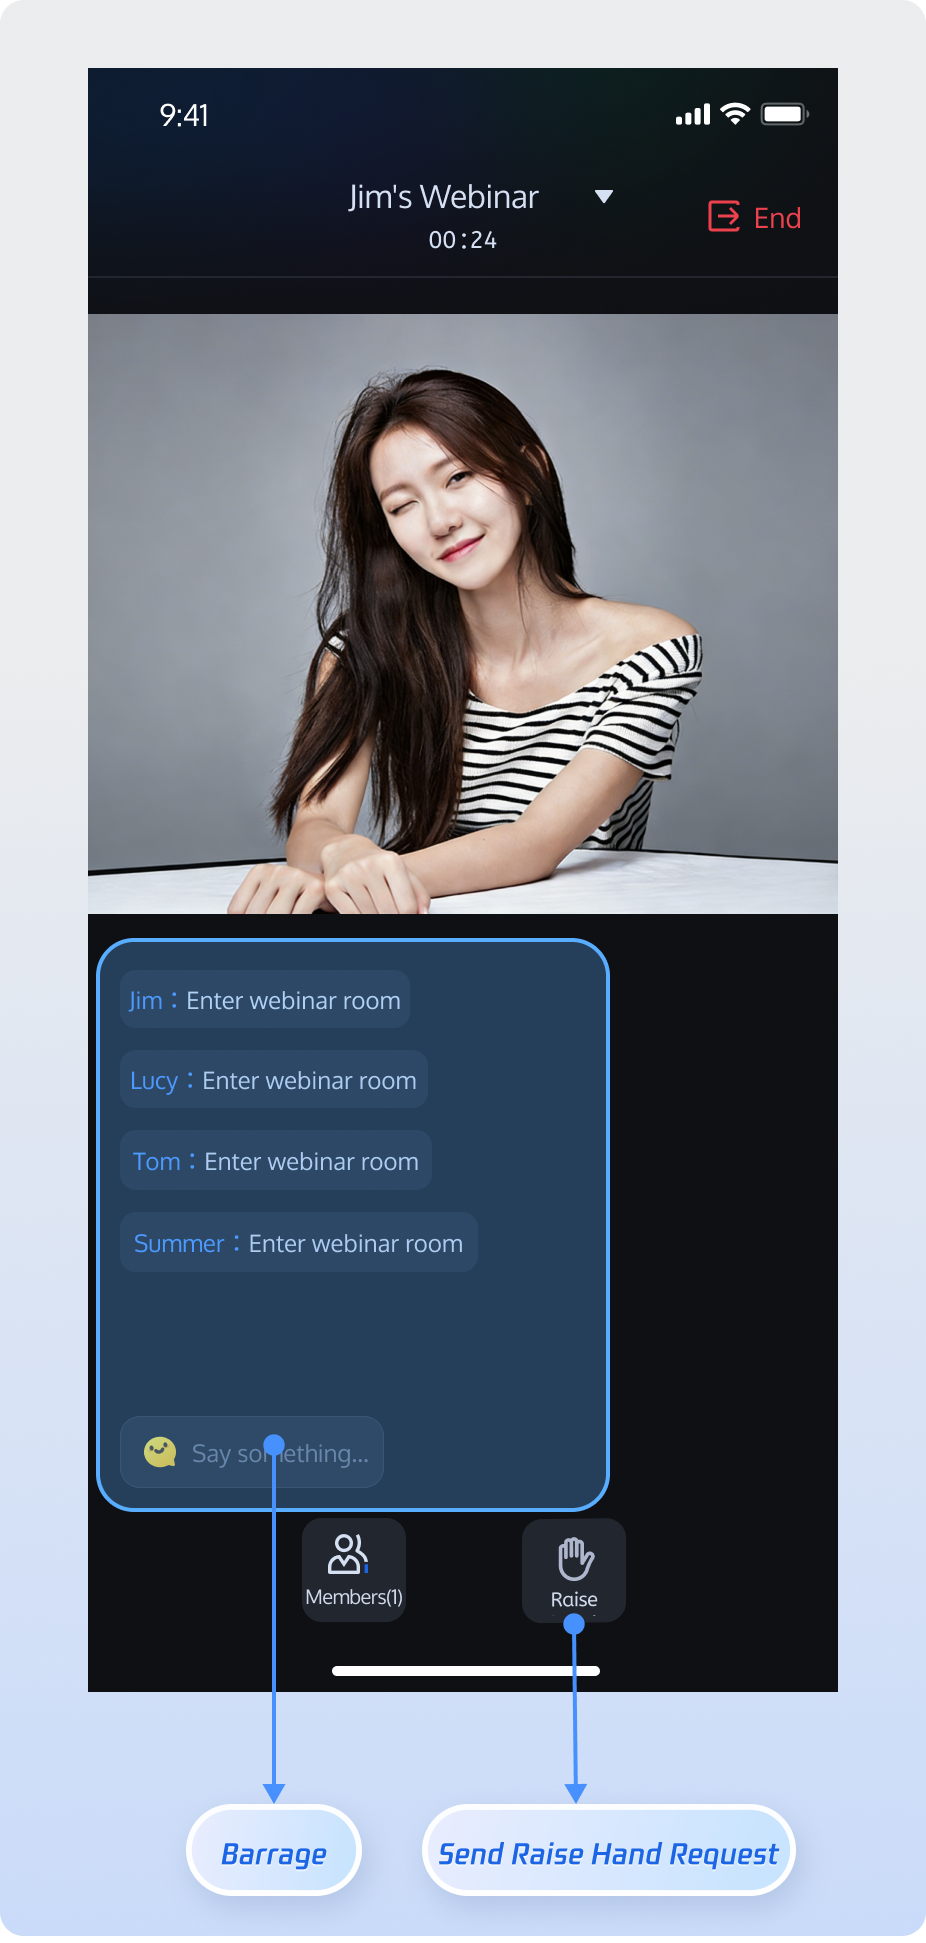
This guide explains how to integrate the TUIRoomKit Webinar scenario into your application. The Webinar scenario enables real-time interaction between hosts, guests, and audiences of up to tens of thousands, delivering ultra-low latency streaming and high-throughput message handling.
What’s the difference between a standard conference and a webinar?
Standard Conference: Designed for small to medium-sized collaborative scenarios where all participants have equal Audio/Video permissions. Features like screen sharing and member management enable full interaction.
Webinar: Built for large-scale live presentations, supporting unlimited audience entry. Audiences can use the Raise Hand feature to apply to become a guest and join the discussion. The system is optimized for high-concurrency messaging in scenarios with tens of thousands of participants, meeting the needs of professional presentations and interactions.
Feature Overview
Host
Guest
Audience
Host can start high-definition audio/video streaming, share screens, and manage participants.
Guest can enable their microphone for real-time voice discussions and sharing.
Supports unlimited concurrent audience entry, ultra-low latency viewing, and high-frequency chat. Audience can use "Raise Hand" to request guest access.
Prerequisites
Activate the Service
Follow the instructions in Activate the Service to claim the TUILiveKit trial version or activate the official TUILiveKit version. Then, go to Application Management to obtain the following information:
SDKAppID: Application identifier used by TRTC for billing and statistics.
SDKSecretKey: Application secret key used to initialize the configuration file.
Note:
The webinar scenario is built on underlying live streaming capabilities. To use webinar features, you must claim the TUILiveKit trial version or activate the official TUILiveKit version to ensure all related features work properly.
Environment Setup
Android 5.0 (SDK API level 21) or higher
Gradle 8.0 or higher
Devices running Android 5.0 or above
JDK 17, 18, or 19
Quick Integration
Step 1: Download TUIRoomKit Component
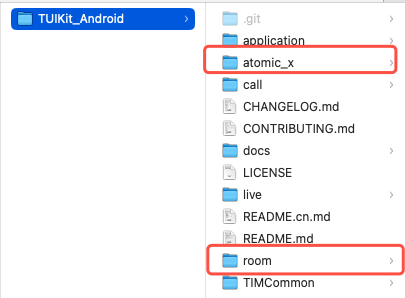
Clone or download the code from GitHub. Copy the room and atomic_x subdirectories to the same directory level as your project's app folder.
Step 2: Project Configuration
1. Import TUIRoomKit Component
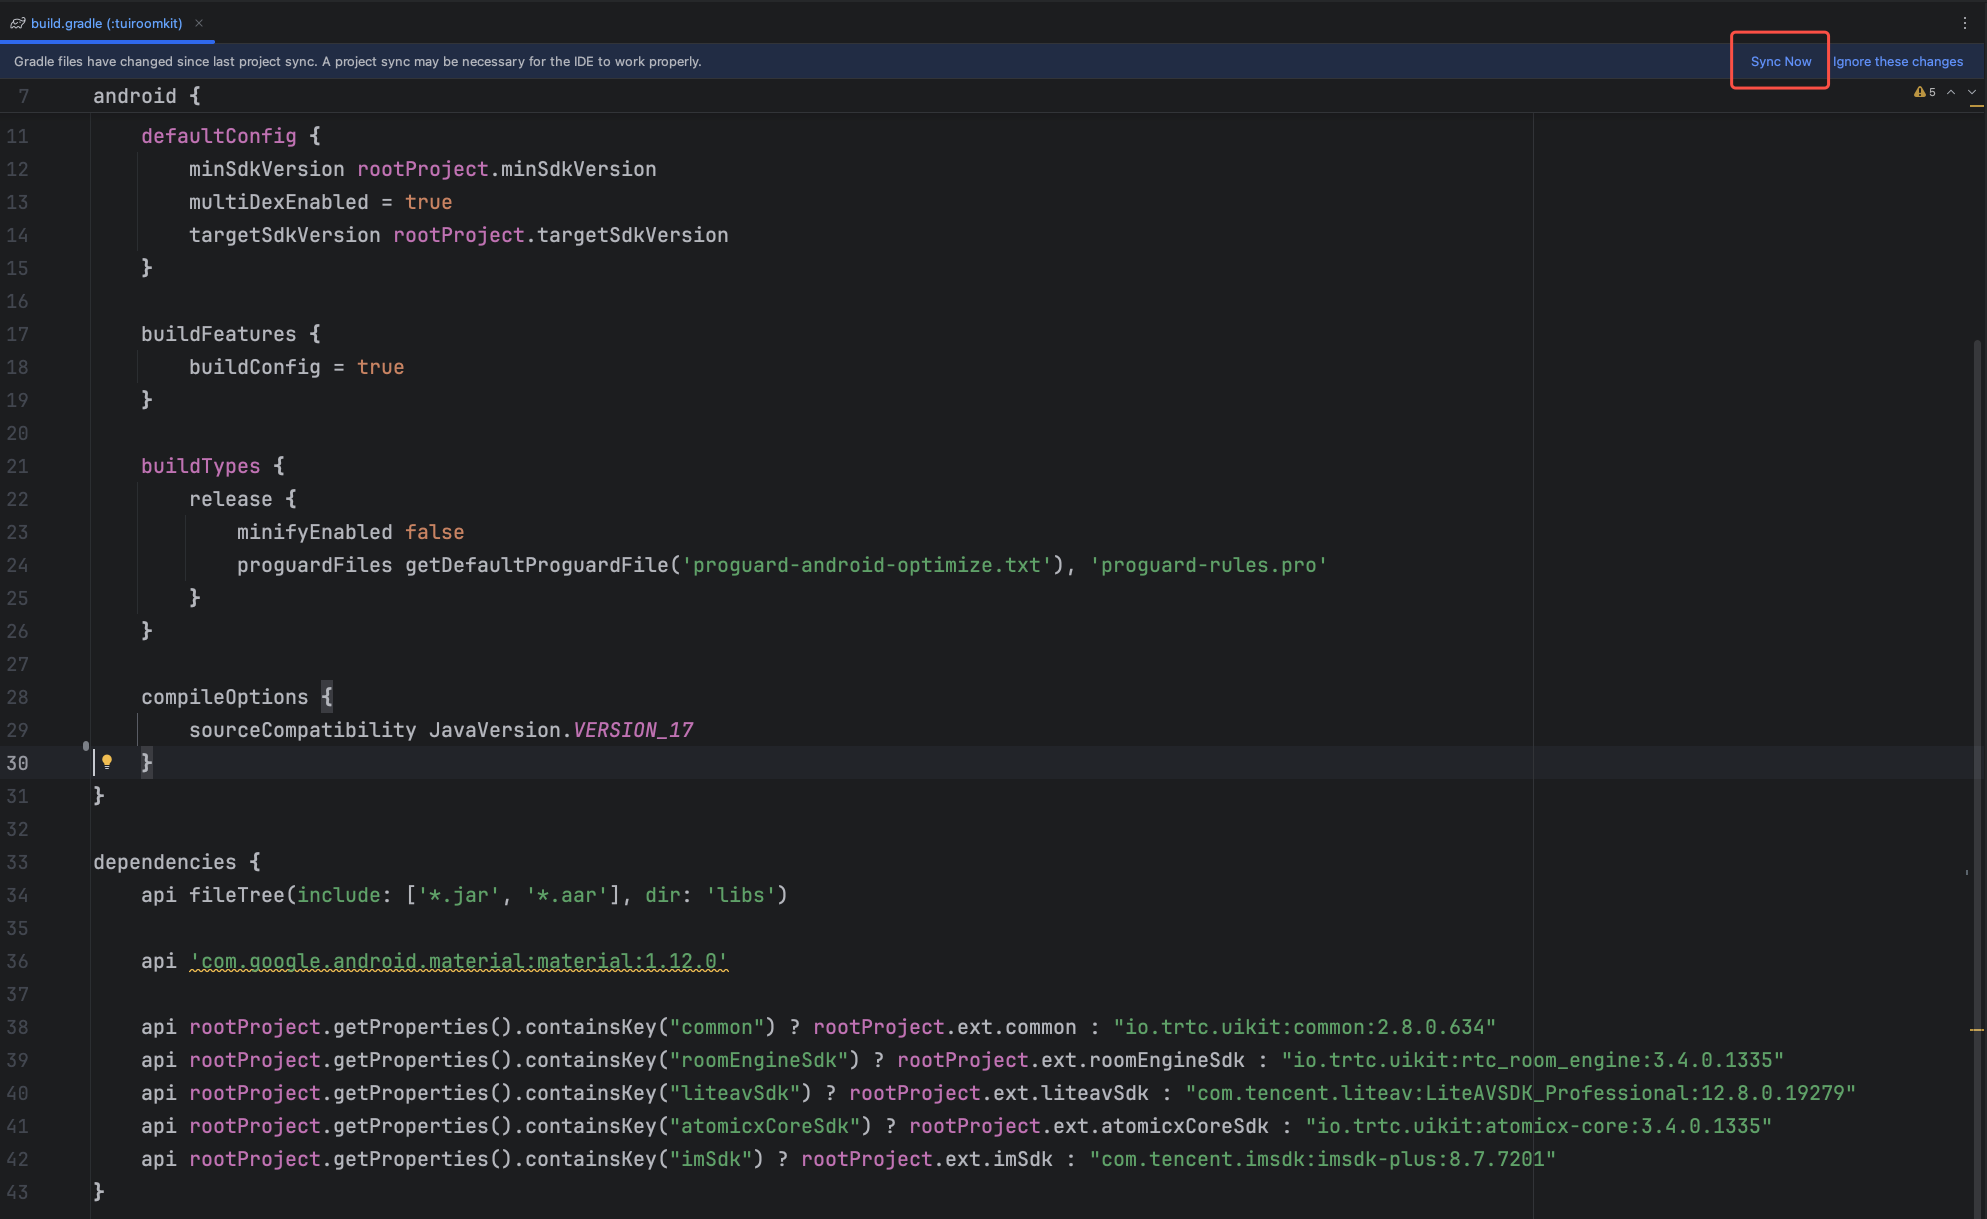
Add the following configuration to your project's root settings.gradle.kts or settings.gradle to import the tuiroomkit component.
To resolve attribute conflicts during AndroidManifest merging, add tools:replace="android:allowBackup" and android:allowBackup="false" to the ` node in app/src/main/AndroidManifest.xml`:
<!-- Add this configuration to override SDK settings -->
<application
android:allowBackup="false"
tools:replace="android:allowBackup" />
</manifest>
5. Complete Project Sync
After these steps, Android Studio typically displays a Sync Now button. Click it to synchronize your project. If not prompted, manually click the sync button in the toolbar. Once syncing completes, the IDE finishes build configuration and indexing, and you can start using TUIRoomKit in your project.
Step 3: Login
After integrating the code, you must log in before using TUIRoomKit features. Verify all parameters are correct:
Note:
The sample code demonstrates direct API calls for login. In production, always call the AtomicXCore login service after completing your own user authentication and login logic. This ensures proper integration with your user management and permission systems and avoids issues from premature login calls.
Unique identifier for the current user. Only English letters, numbers, hyphens, and underscores are allowed. To avoid multi-device login conflicts, do not use 1, 123or other simple IDs.
userSig
String
Authentication ticket for Tencent Cloud.
For development: Use GenerateTestUserSig.genTestSig or the UserSig Assistant Tool for a temporary UserSig.
Callback for result. Returns error code and message on failure.
Step 5: Create a Webinar Room
The RoomMainView component provides the core interface for multi-party audio/video rooms. The example below shows how to embed RoomMainView in your app as a host.
Implementation Steps
1. Load creation view: Instantiate RoomMainView with lazy loading.
2. Configure entry settings: Set auto-enable options for audio/video devices when entering the room.
3. Initialize main room page: Set up the main room page as a host.
4. Add the view to Activity: In your Activity's onCreate method, add RoomMainView and fill the layout.
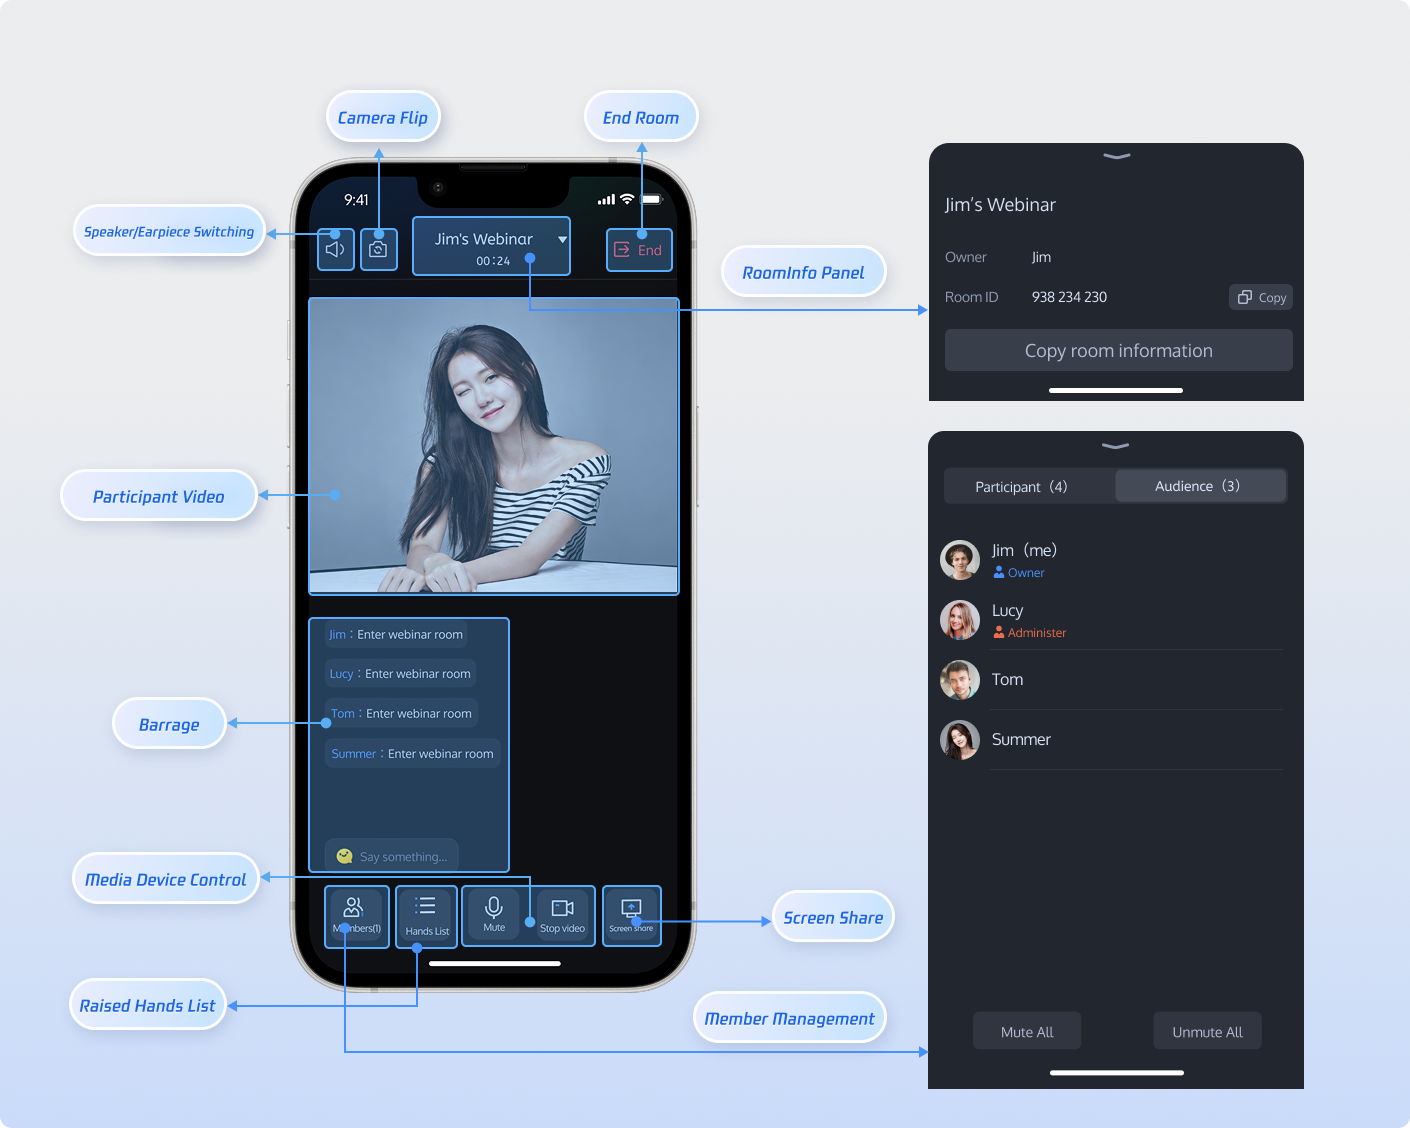
Once you've integrated RoomMainView, your app will have a complete webinar page—including member management, audio/video controls, screen sharing, live comments, video display, and room information—covering all TUIRoomKit core features.
Customize UI
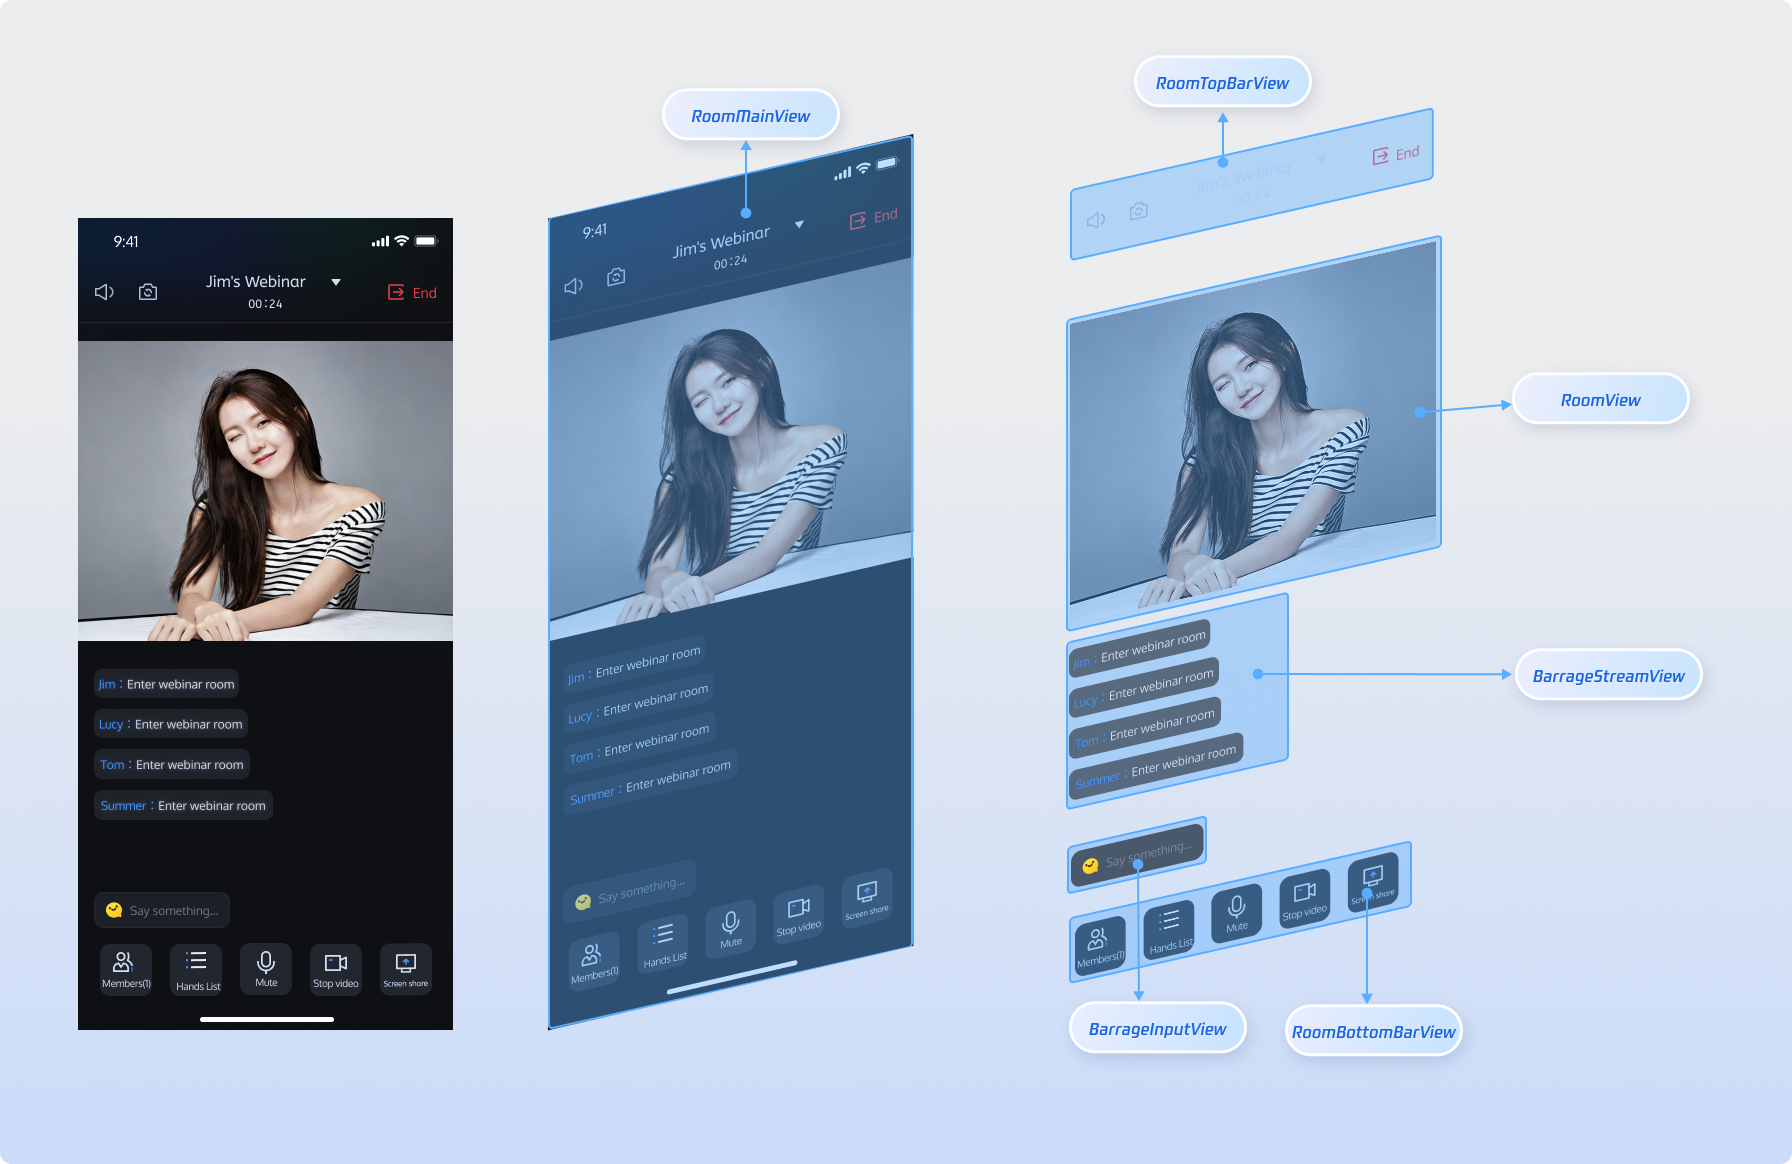
The RoomMainView main room page is highly customizable. You can tailor the UI to fit your product and business needs. The following overview details each view component in RoomMainView to help you adjust quickly.
Bottom toolbar: microphone, camera, screen sharing, hand raise list, member management buttons
Rearrange button order and style (color, size); add business features (in-meeting call, beauty filters)
Customize Icons
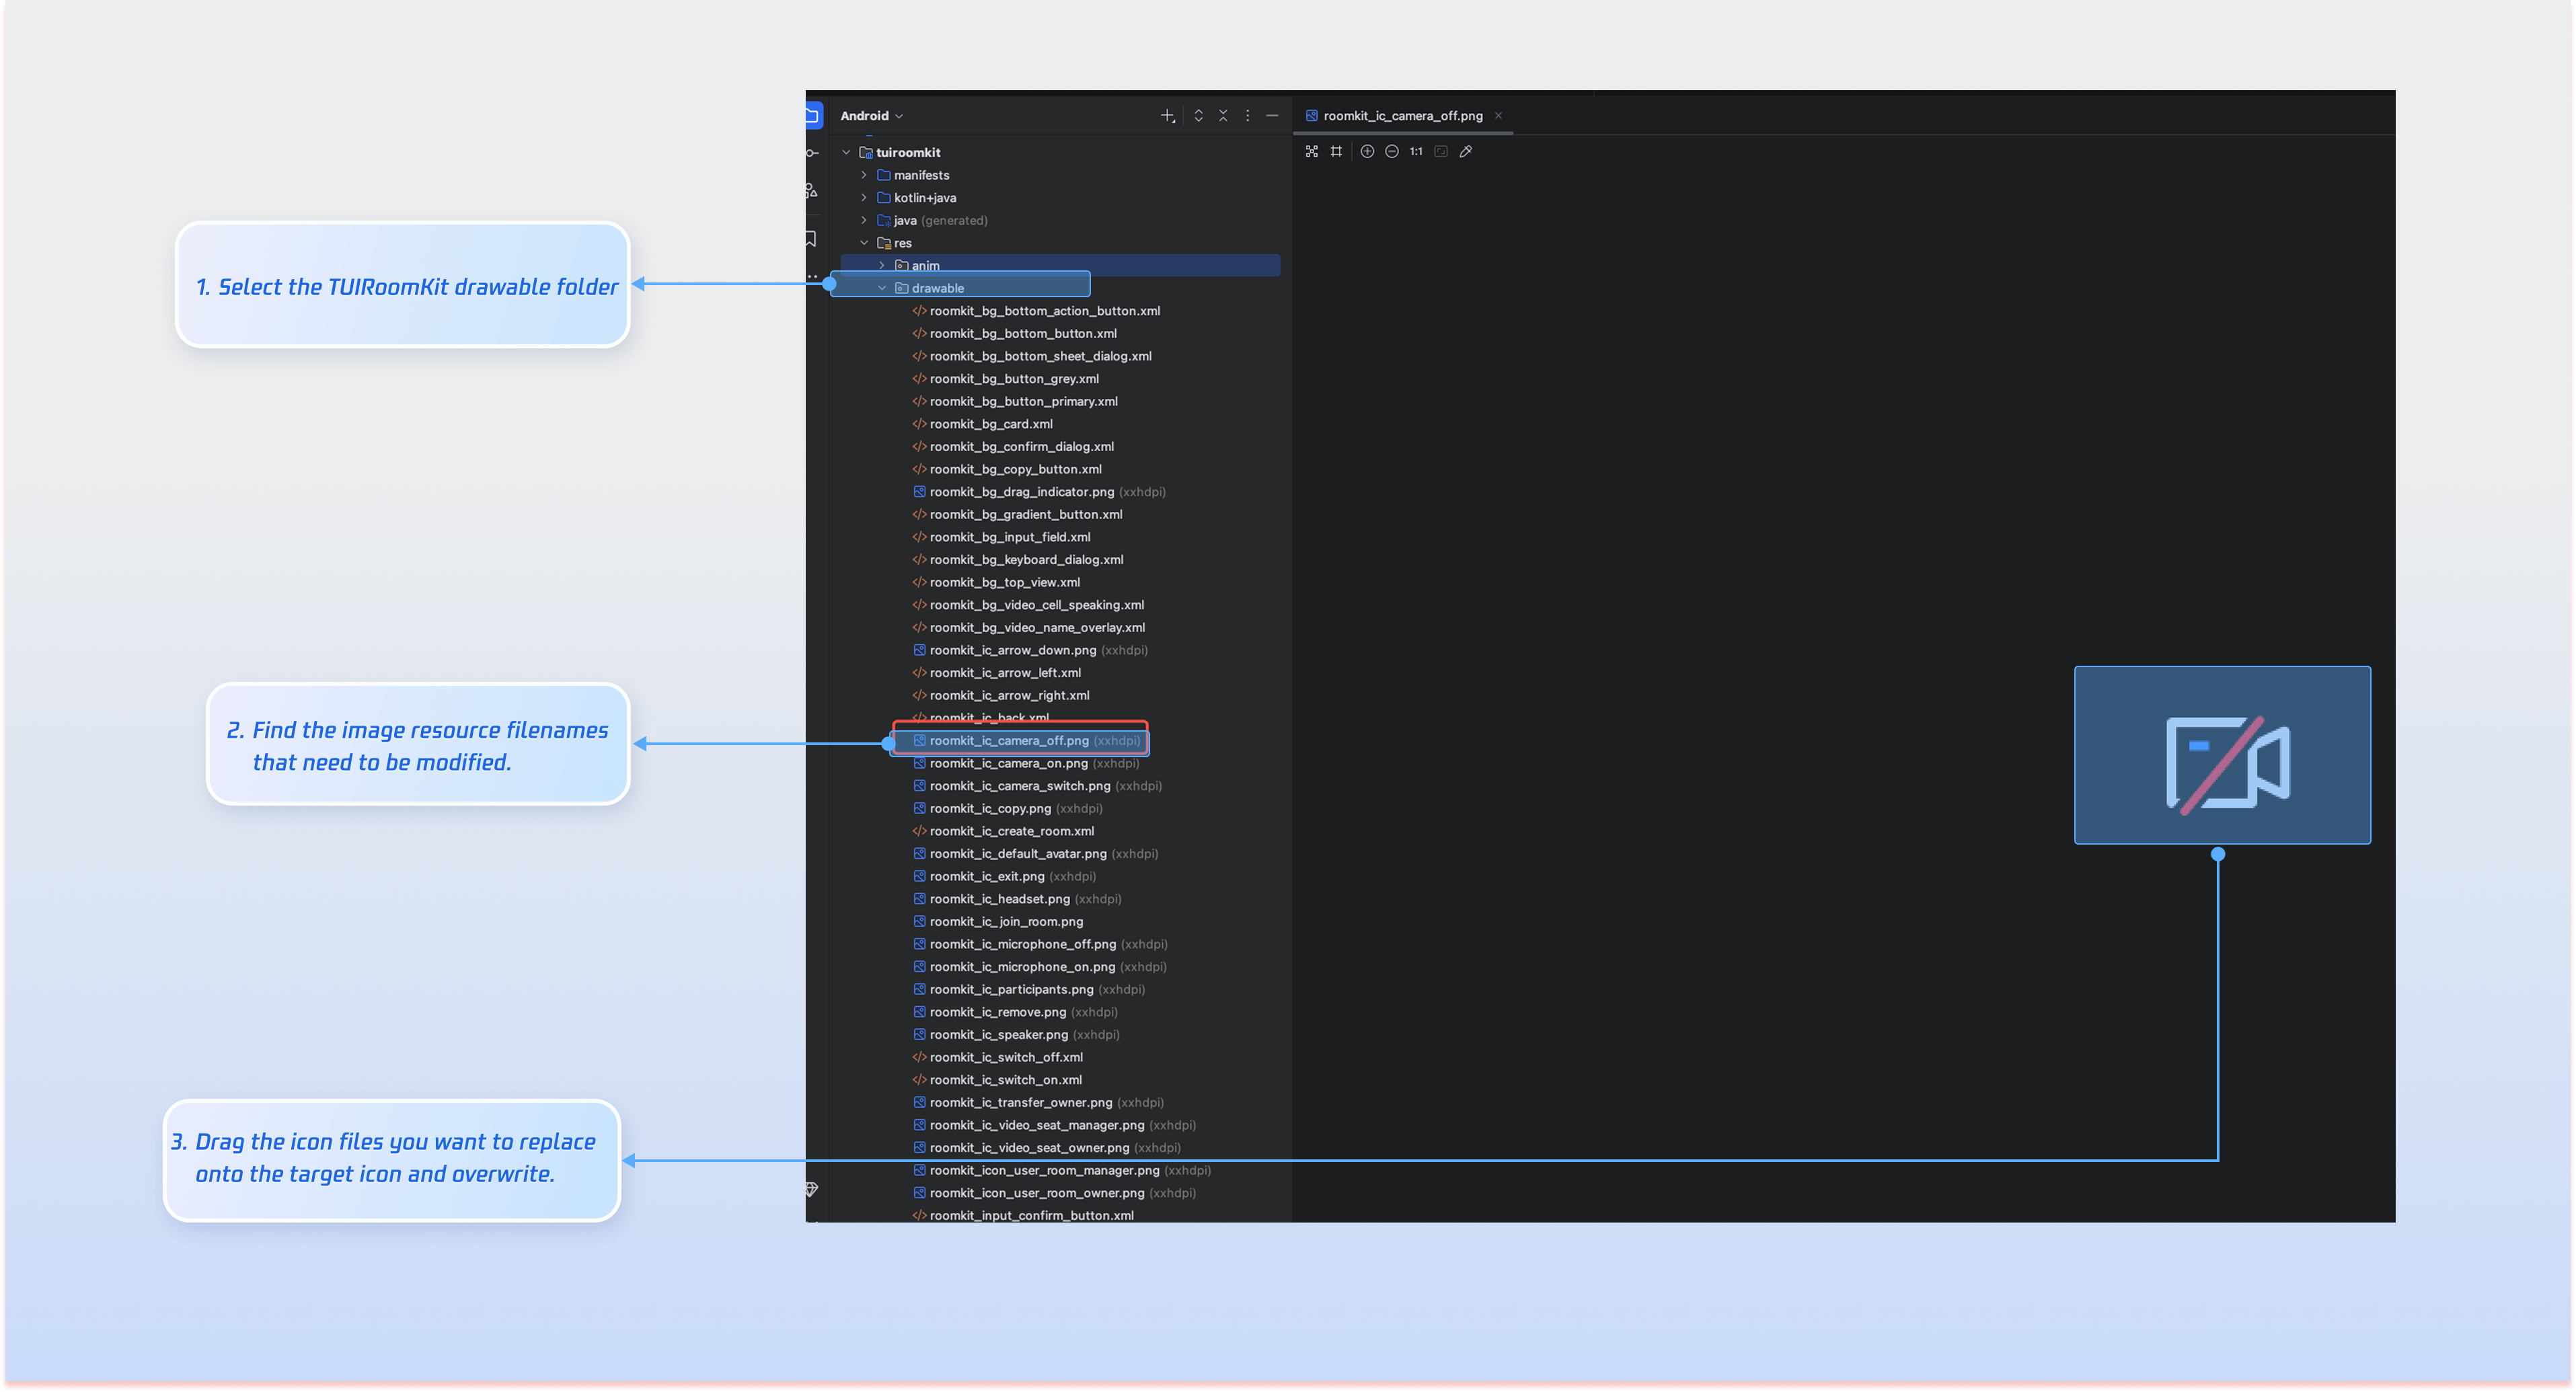
Once TUIRoomKit is integrated, you can directly replace icon resources to match your product’s scenario and interaction requirements.
Common Image File List
Icon
Filename
Description
roomkit_ic_camera_off.png
Camera off icon
roomkit_ic_camera_on.png
Camera on icon
roomkit_ic_microphone_off.png
Microphone off icon
roomkit_ic_microphone_on.png
Microphone on icon
roomkit_icon_user_room_manager.png
Microphone on icon
roomkit_ic_video_seat_owner.png
Room owner icon
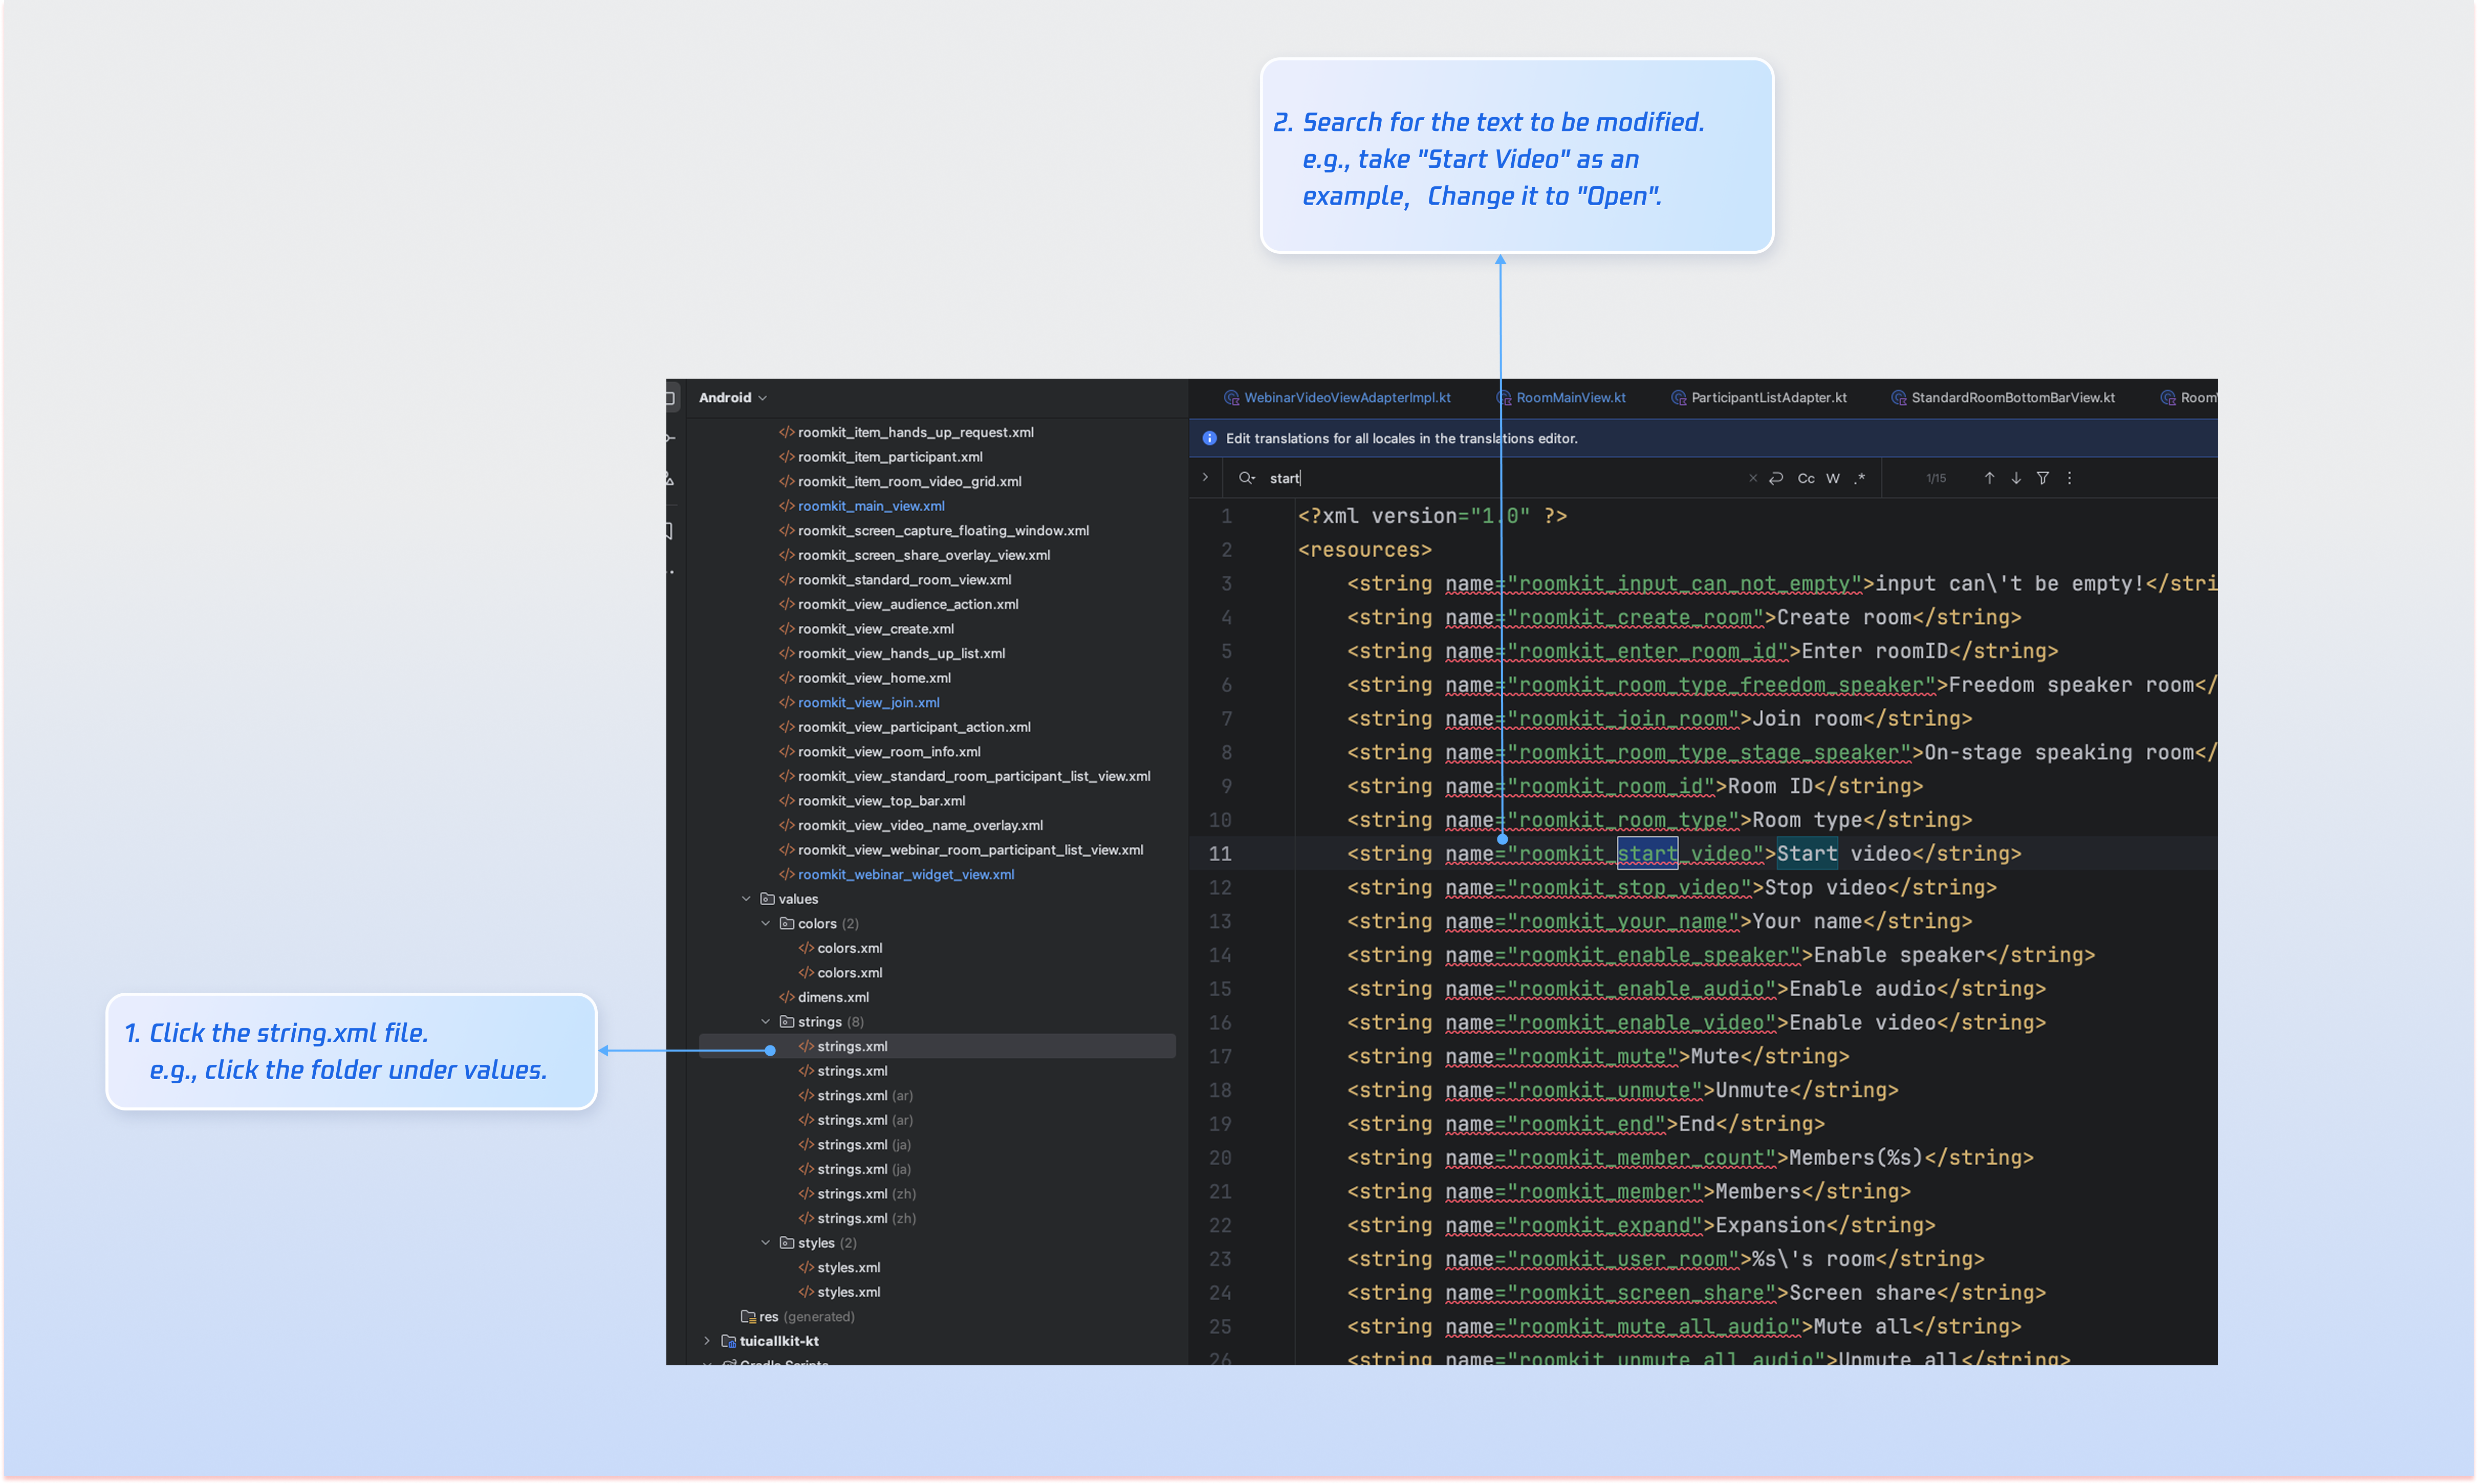
Customize Texts
TUIRoomKit manages UI text display using Android XML resource files. Modify UI strings directly in the XML file as needed:
FAQs
Do I need to call login every time I enter a room?
No. Typically, you only need to call LoginStore.shared.login once. We recommend linking both LoginStore.shared.login and LoginStore.shared.logout to your own login logic.
Why is there no video or audio when collecting audio/video in the background on Android 14 or above?
On Android 14 and above, if your app collects camera or microphone data in the background, you must start a foreground service and declare the relevant service type. Otherwise, data collection will not work. Follow these steps:
1. In AndroidManifest.xml, declare permissions FOREGROUND_SERVICE, FOREGROUND_SERVICE_CAMERA,
and FOREGROUND_SERVICE_MICROPHONE, and define the service: